Nondestructive Inspection Progresses Scan Speed, Image Resolution
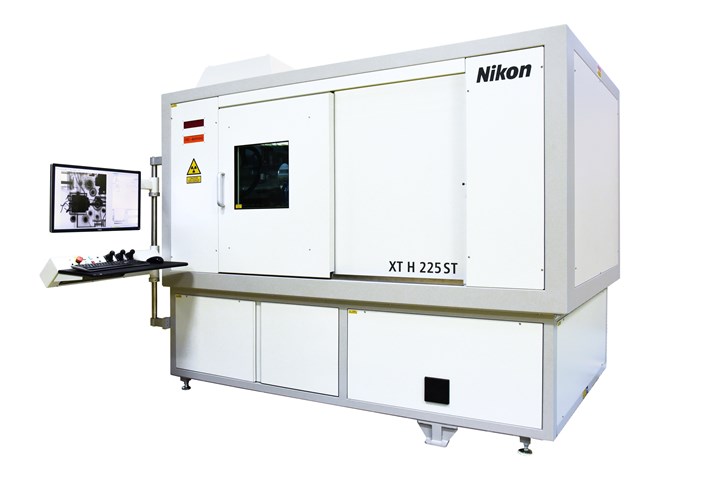
The combination of three features, Rotating Target 2.0, motorized adjustable FID and Offset.CT, makes it possible for a user to find balance between scan speed and resolution while implementing high quality control.

Photo Credit: Nikon Metrology
Nikon Metrology’s industrial microfocus X-ray computed tomography (CT) inspection solutions are now enhanced with a novel Offset.CT reconstruction algorithm, adjustable FID and rotating target technology for more progressive scan speed and image resolution.
Compared to traditional offerings used for inspection, Nikon Metrology’s systems, with the aid of the Offset.CT reconstruction algorithm, are able to scan larger components—such as aluminum castings or battery modules—and perform this at higher geometric magnification.
Offset.CT is a scanning method that allows small or large components to be inspected fully while only part of the sample is within the field of view (FOV) during rotation. The component is placed such that only just over half of the object lies within the X-ray cone beam, allowing a much wider FOV and reconstruction volume. With this, Nikon says larger components, even those wider than the detector itself, can be scanned without having to use a larger CT machine, and components can be placed much closer to the X-ray source for higher magnification and therefore increased voxel resolution. Performance of critical inspection tasks including identification of small internal defects, measuring features in the interior of complex components or detecting deviations from a nominal CAD model are now possible; the Offset.CT module is available on all Nikon Metrology X-ray CT systems from 180-450 kV.
Moreover, Nikon says it is able to triple the flux, or X-ray intensity, for a given focal spot size without reducing image resolution using its Rotating Target 2.0 technology. Scan times are consequently shorter and/or denser samples can be penetrated. Rotating Target 2.0 features a maximum voltage of 225 kV and a maximum power of 450 W, but for larger and denser components a microfocus 450 kV rotating target X-ray source is available.
Adjustable FID is a standard feature in Nikon Metrology 225 kV XT H systems and Large Envelope CT systems up to 450 kV. The benefit of shortening the distance between the source and the detector using motorized FID functionality is that the X-ray flux is increased, notes the company. It serves to improve the signal-to-noise (SNR) ratio and the image quality of digital radiographs and 3D voxel data, in addition to enabling increased scanning speed.
Overall, Nikon Metrology contend that the 3D data acquired by these CT systems can help save costs, reduce scrap and decrease failure rates throughout the lifecycle of a product. This applies in the product development phase as well as the pre-series phase, where parts are scanned to optimize production parameters. Moreover, the solutions are able to deliver these benefits at scale, supporting series inspection in the production environment for improved process control.
Related Content
-
The Secrets to Hard Milling Success
The Secrets to Hard Milling Success
-
Hands-on Workshop Teaches Mold Maintenance Process
Intensive workshop teaches the process of mold maintenance to help put an end to the firefighting culture of many toolrooms.
-
The Ins and Outs of Hot Runner Temperature Control
A training checklist that explains the why and how of proper hot runner temperature control and system management.


.png;maxWidth=300;quality=90)
_970x250 4.png;maxWidth=970;quality=90)