
Eliminate Unexpected Production Delays
Basic rules for getting optimal results from an ultrasonic cleaning system.
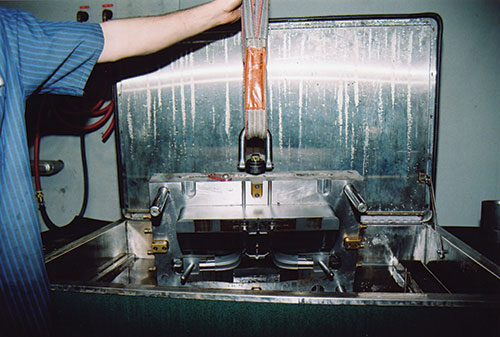
Here, a dirty injection mold is placed into an ultrasonic cleaning unit. This system produces cavitation bubbles within a non-toxic solution that helps prevent damage to the mold, extending mold life regardless of the contaminant, mold material, or mold shape, size or complexity. Images courtesy of Omegasonics.
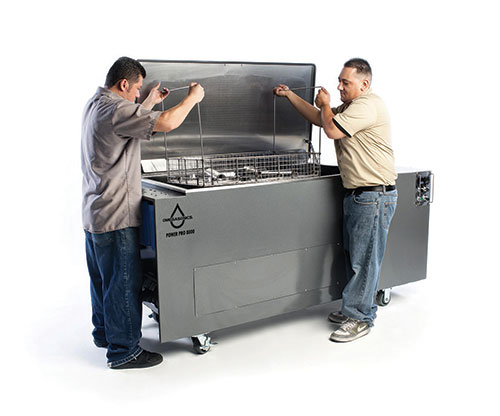
This ultrasonic cleaning system features a 110-gallon capacity and 8,000-watt peak ultrasonic cleaning for large-volume, large-power precision cleaning requirements, such as for plastic injection molds.


Regular mold cleaning is the simplest defense against issues that cause unscheduled production interruptions. However, incomplete or incorrect cleaning procedures, such as leaving behind residue or using the wrong cleaning solution, can damage molds and cause production problems or require more frequent cleaning, which increases maintenance costs. Ultrasonic cleaning can help eliminate these possibilities.
An ultrasonic cleaning system produces cavitation bubbles within a non-toxic solution. This helps extend mold life by cleaning the molds thoroughly without damage, regardless of the shape, size or complexity of the mold, contaminant or mold material. The right combination of heat, detergent and time is key.


The ultrasonic cleaning process itself is straightforward and virtually hands-off. The operator first chooses the proper cleaning solution, and selects the appropriate temperature and the amount of time the molds will be cleaned, which is typically between 30 and 60 minutes. Then, the operator submerges the mold into the bath, activates the machine and can tend to another task until the cleaning process is complete. The mold can then be moved to a rinse bath and, if needed, to a dryer.
Although the machine does all the work, there are some basic rules to follow to achieve optimal results and to keep the ultrasonic system operating efficiently.
DO
Use the right size cleaning unit/tank. Consider the size and number of the molds to be cleaned and the type of contaminants to be removed. Smaller-capacity units cost less than those with bigger tanks, but may crowd parts and clean less efficiently, which can result in still-dirty molds or longer running times to get the molds clean. A correctly sized tank allows enough space around the mold for proper ultrasonic cleaning to occur while conserving energy and cleaning chemicals.
Choose a water-based cleaning solution. Different solutions excel at cleaning different contaminants in ultrasonic cleaners. They generally are categorized as descalers, enzymatic detergents, low-pH cleaners and specialty detergents. Almost always, a high-pH cleaning detergent is ideally suited for cleaning production molds. Consider the material the molds are made of and the types of contaminants to be removed, and always use water-based detergents. They cost less and are safer to use and dispose of than solvents, which also are unhealthy for humans and require special precautions to control the dangerous vapors and hazardous waste materials they generate, adding time and cost.
Place the mold on a support rack at the bottom of the tank. Any mold placed into an ultrasonic unit for cleaning must be on a rack or tray, or in a basket. This allows the cavitation bubbles to penetrate all areas of the injection mold to ensure thorough cleaning.
Use the right temperature. Injection molds are cleaned most thoroughly when the ultrasonic detergent solution is maintained between 110°F and 165°F. Without maintaining a consistent temperature, heating and run time will vary with each batch, which can result in longer overall run times, or, if the temperature runs too hot, in breakdown of the cleaning detergent. Running the cleaner for extended periods at higher temperatures may effectively clean parts, but it will require extra electricity and waste time. As temperature increases, the number of cavitation bubbles initially increases before falling off. At the liquid’s boiling point, cavitation produced by ultrasonic sound waves introduced into the liquid stops completely.
DON’T
Completely disassemble molds before placing them in the tank. It’s not necessary to completely take apart or pre-clean molds before they go into the ultrasonic cleaning tank. The detergent and high-frequency ultrasonic waves penetrate all surfaces, even hidden passageways, narrow openings, crevices, cracks and blind-drilled holes, without manual scrubbing or harsh chemicals/solvents. Reducing the frequency a mold needs to be disassembled also saves considerable time and is better for the equipment in the long run.
Place molds directly on the bottom of the cleaning unit. Setting parts directly on the tank bottom increases the incident of cavitation erosion or pitting of the tank. This eventually causes the ultrasonic cleaner to leak and reduces its overall life expectancy. Always use a basket or rack to suspend parts in the unit.
Overbuy your cleaning unit. The key to choosing the right ultrasonic cleaning system is determining what needs to be cleaned and how often it needs to be cleaned. Tabletop, benchtop and full-size industrial systems range in capacity from three-quarters of a gallon to more than 100 gallons. Additionally, they are available in single- and multi-stage varieties. For very large molds or continuous use and high throughput, full-size units are better choices. For smaller molds or occasional cleaning needs, a benchtop unit may be sufficient.
Following these simple steps will help ensure precision cleaning from an ultrasonic unit. Maintaining clean molds keeps them in good working order so they require less start-up time, produce less waste and demand less troubleshooting. All of this results in maximum run time for increased production and efficiency.


Related Content

The Ins and Outs of Hot Runner Temperature Control
A training checklist that explains the why and how of proper hot runner temperature control and system management.
Read More
Hands-on Workshop Teaches Mold Maintenance Process
Intensive workshop teaches the process of mold maintenance to help put an end to the firefighting culture of many toolrooms.
Read More
VIDEO: Hot Runner Maintenance Tips
Scott Clark, Hot Runner Business Manager for Husky Technologies, breaks down maintenance practices for hot runner systems.
Read More
Portable Low-Heat, Non-Arcing Resistance Welder for Mold Repair
Rocklin’s user-friendly MoldMender Micro Welder delivers simple and cost-effective localized repair in-house with precision and versatility, enhancing mold and die durability and reducing disassembly and downtime.
Read MoreRead Next

Reasons to Use Fiber Lasers for Mold Cleaning
Fiber lasers offer a simplicity, speed, control and portability, minimizing mold cleaning risks.
Read More
Are You a Moldmaker Considering 3D Printing? Consider the 3D Printing Workshop at NPE2024
Presentations will cover 3D printing for mold tooling, material innovation, product development, bridge production and full-scale, high-volume additive manufacturing.
Read More
How to Use Strategic Planning Tools, Data to Manage the Human Side of Business
Q&A with Marion Wells, MMT EAB member and founder of Human Asset Management.
Read More