ESSENTIAL READING
VIEW ALLHow to Assess and Control Surface Texture Quality
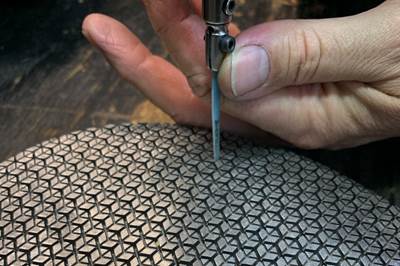
Surface texture measurement offers better methods for describing plastic surfaces.
Read MoreHow to Polish Ribs for Proper Part Release
Using the right tools and abrasives is essential to polish a mold to the required final finish.
Read MoreLine Width vs. Depth Ratio in Laser Engraving
A laser does not produce 90-degree sidewalls. It requires a certain amount of draft in order to produce the required pattern.
Read MoreHow to Achieve the Best Mold Finish
A look at factors that impact the polishability of tool steels and recommendations for obtaining a high-gloss finish.
Read MoreHow to Overcome Complex Mold Texturing Problems
Key benefits when considering laser technology for mold texturing and repair.
Read MoreUnderstanding Diamond Compounds
Diamond compounds, with their varied grades, colors and base options, provide a comprehensive solution for mold builders in need of precise and superior polishing across diverse materials and applications.
Read MoreLatest Surface Treatment News And Updates
Preventive Maintenance Cleaning System Offers Added Safety Improvements
The iD Additives’ Eco-Pro Mold Cleaning System now features stainless steel fittings and pressure regulators to help users maintain clean water lines in injection molds in order to achieve optimal cooling efficiency and turbulent flow.
Read MorePTXPO 2025 Profile Preview Part 4 of 4: Discover Cutting-Edge Moldmaking Solutions
Here is a brief overview of some of the advanced moldmaking technologies you’ll find at PTXPO 2025. Join fellow molders, moldmakers, brand owners, OEMs and their full suite of suppliers in Rosemont, Illinois, for three days of nonstop networking, education and business development opportunities where you can network, learn and grow your business.
Read MoreAutomating Mold Polishing With AI-Powered Robotics
Empowering human workers and harnessing the precision of AI-driven robots may help streamline the polishing process for some molds and tooling.
Read MorePTXPO 2025 Profile Preview Part 2 of 4: A Closer Look Into Exhibitor Solutions for Mold Builder Needs
Dive into this sneak preview to get to know more about the exhibitors that will be showcasing a variety of products, technologies and services related to moldmaking at PTXPO 2025.
Read MoreHow To Master Textured Molds With Design and Quality Control
Collaboration between design, materials and manufacturing teams ensures optimal development of durable, consistent custom textured molds.
Read MoreMMT's Most Popular Maintenance Reads of 2024
Peruse this past year’s top maintenance content, including topics like inspection/measurement, maintenance and repair and surface treatment.
Read MoreFeatured Posts
MMT's Most-Viewed Case Studies in 2024
Did you miss any of MoldMaking Technology’s most-viewed case studies from 2024? Now’s your chance to dive into these trending topics.
Read MoreHow to Polish Ribs for Proper Part Release
Using the right tools and abrasives is essential to polish a mold to the required final finish.
Read More2024 Moldmaking Insights: A Year in Review Part 2
A look back at the top moldmaking trends of 2024, as revealed through MMT's analytics. This review highlights the most popular technical articles, case studies, tips and best practices that captured the industry's attention over the past year.
Read More2024 Moldmaking Insights: A Year in Review Part 1
A look back at the top moldmaking trends of 2024, as revealed through MMT's analytics. This review highlights the most popular technical articles, case studies, tips and best practices that captured the industry's attention over the past year.
Read MoreMoldMaking Technology's Most-Viewed Content of 2024
The most popular MoldMaking Technology content according to analytics reports over the past year.
Read MoreLine Width vs. Depth Ratio in Laser Engraving
A laser does not produce 90-degree sidewalls. It requires a certain amount of draft in order to produce the required pattern.
Read MoreFAQ: Surface Treatment
How do you polish aluminum?
Buffing occurs in two steps. First, a hard felt buff is impregnated with three-micron diamond until the bottom glistens black. Then some denatured alcohol is squirted onto the aluminum. With the bottom of the buff only - never use the sides of a felt buff, as this guarantees that deep scratches will be cut into the finish - press down only hard enough to buff smooth the entire surface. This hard buffing will erase any imperfections in the surface such as remaining stone marks or brush marks. This microlapping will even help fix mistakes in flatness depending upon the skill of the polisher.
Once you achieve as fine a finish as possible, step two - soft buffing - can begin. At this point the polisher is no longer polishing, but only adding depth and gloss to the liquid black micro finish. The bottom of a soft buff is impregnated with three- or one-micron diamond until the bottom glistens just like the hard buff. Again, only use denatured alcohol as the lubricant and buff out the finish until it is as fine as possible. Anyone who stubbornly buffs with mineral spirits and has gotten to this point has just realized they've got a mess on their hands which can only be solved by more buffing, Don't overwork the surface and never brush or buff with anything other than denatured alcohol and you'll save yourself a lot of trouble at the end.
Once you have lightened up on your downwards hand pressure until the soft buff finish is as fine as possible, it is then time for the final step of rubbing the finish out by hand, which removes all traces of buff marks.
Source: How to Optically Polish Aluminum
How can moldmakers design for maintenance?
Here are some design for maintenance tips for your consideration:
Tip #1: Consider the material being used to build a given tool. When choosing this material, first ask the question: What is the expected life of the product? For mold classification purposes, we can say a “Class 101 mold,” but for the investment, just like our vehicles, we want them to last. I compare one million cycles on a mold to 100,000 miles on a vehicle. In the early days, one million cycles or 100,000 miles was a lot, but not anymore. We expect our tool to exceed one million cycles and our vehicle to exceed 100,000 miles; therefore they should be designed accordingly.
Another material question to ask is: What resin are you running and is it abrasive or corrosive? Some materials are harsh and require extremely hard or exotic steels. There is a big difference in tool wear rate on a simple open/shut tool with no action versus a tool that has moving components. When considering those moving parts, material selection is critical. Corrosion can come in the form of water contact, acidic materials and outgassing. Choosing materials that can stand up against these elements is critical for achieving long tool life.
Tip #2: Include front-loading components as much as possible. Disassembling the whole tool is extremely time consuming. For this reason, we attach the fixed components on the parting line side rather than the backside when we can. In the accompanying images, you can see a simple representation of this in action. Cavity blocks bolted from the front; inserts that can be pulled from the front; hot runner gate tips that can be cleaned in the press; angle pins that can easily be removed; and venting with removable vent dumps are all design elements that will reduce the time to do PM.
Tip #3: Standardization of mold components is a great area to focus on. Components that can be easily standardized include springs, switches, angle pins, angle bushings and shot counters. Keeping the required variety of such parts at a minimum helps the PM shop keep less inventory.
Often, we find ourselves building several molds for the same customer. If you are able to standardize across multiple tooling projects and also use off-the-shelf components, sourcing becomes easier and lead times can be dramatically reduced. In many cases, skilled moldmakers are able to order stock blank components and finish them in-house with the detail needed, whether it be cutting them to length or adding other details.
Source: Design Your Tools for Moldability... and Maintenance


