
Best Practices for Surface Finishing
In moldmaking, the surface of the mold has a direct impact on the surface of the product being molded. Because of this, proper surface finishing is essential to producing quality parts.


The process of surface finishing requires a variety of tools, materials, and most importantly, highly specialized skills. It is an art that takes years of experience to perfect, but some basic principles and techniques can provide a good start. This article will examine the three major processes necessary to produce a highly polished, lustrous metal surface: grinding, hand stoning and diamond polishing.
1. Grinding
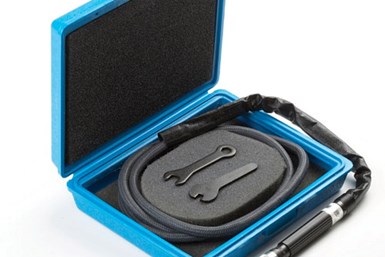
A hand grinder is the finisher’s basic tool for light metal removal.
While machining is technically the starting point of the surface finishing process, grinding is where the real work begins.
After metal is machined, its surface condition is usually rough with ridges and cutter marks. Finishers must use a hand grinder, the basic tool for light metal removal, to get the surface smooth enough to eventually finish with hand stones and, ultimately, diamond polish.
Grinders have a tendency to follow the wavy contours of the rough surface, which makes it difficult to develop the smooth or flat surfaces required for subsequent stoning. Whenever possible, direct the grinding strokes at a 45-degree to 90-degree angle relative to the grooves developed in the machining process.
Give careful consideration to the direction of rotation. When taking a stroke in a direction opposite to a cutting tool rotation, the grinder has a tendency to run away from the cut. On the other hand, stroking into the rotation of the wheel can cause the stone to cut deeper than is desired.
Don’t try to cover too large an area at any one time. It’s difficult to maintain control and uniform pressure on the wheel over a large area. An experienced craftsman will work on a number of small areas and then blend them together.
Another good practice is to crisscross the grinding strokes to ensure a uniform surface. When smoothing a surface, grind in one direction to completely cover the area being worked on. Then cross the grinding strokes until all of the previous grinder marks have been removed.
2. Hand Stoning


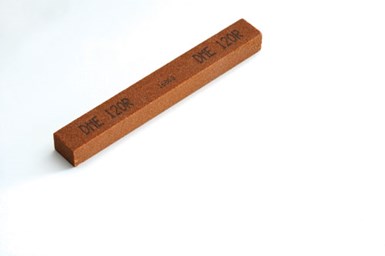
When hand stoning, start with a courser grit stone and work your way finer.
Once you’ve arrived at the point where all the metal has been ground to satisfaction, the surface should be examined to determine if it’s ready for hand stoning. Check milled surfaces to see if the cutter marks are fine enough to make further hand grinding unnecessary.
Choosing the initial grit of stone depends upon the degree of finish left by the machining, grinding or filing operation. Machining usually results in a coarser finish than grinding; therefore, a coarser grit stone should usually be used. For a ground finish, stoning can begin with a finer grit stone.
Preliminary stoning may be done with a 240 grit stone to remove final dips, depressions, waves or other imperfections and achieve a flat or properly contoured surface. If defects are not too great, a 320 grit stone will be sufficient. The stone should be moved back and forth, with medium pressure applied, over the surface in a direction 45 degrees or 90 degrees from the direction made by the last tool marks.
Polishing, from a purely physical point of view, is the process of producing a series of overlapping “scratches” that get finer and finer. To accomplish this, it’s important that for each finer grade of stone used, the angle (direction) be changed relative to the marks made by the preceding coarser stone. In this way, the marks of one grit size are erased by the subsequent finer-grit stone. It is critical that each finer grit stone completely removes the marks of the last grit. Neglecting to do so will result in a shiny, but nonetheless, scratched surface.
3. Diamond Polishing

Diamond compound consists of diamond particles suspended in a proprietary vehicle like an oil.
Diamond polishing is the last step of the polishing process—depending upon how much of a smooth luster must be achieved. A variety of diamond compounds—diamond particles suspended in some proprietary vehicle, such as an oil—are available in the marketplace. Begin by applying a small amount of coarser diamond compound to the surface being worked.
Then, by means of a bristle, brass or steel brush, swirl the compound over the surface using a rotary tool at a slow speed to avoid throwing the compound off the surface. A speed of 500 rpm for roughing, or 5,000-10,000 rpm maximum for final polishing, is a good rule. Brush the surface until all that is visible are fine swirly marks left by the brush’s rotary action. There should be no stoning marks visible at all.
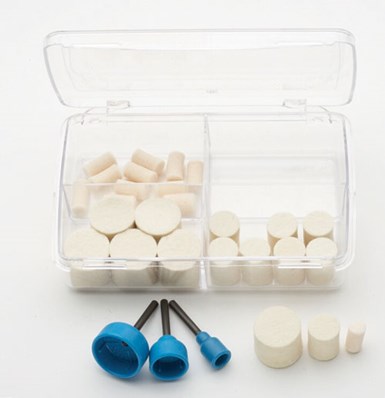
Felt bobs are available in various degrees of hardness.
The next step—removing the swirly marks left by the bristle brush—is accomplished with a felt product, usually a felt bob. Felt bobs are available in various degrees of hardness, pre-assembled to a shank or retained in a shanked nylon holder. Mount the bob in a rotary tool and, using light to moderate pressure, polish the surface with diamond compound until all that is visible are felt swirls.
Before progressing to a finer grade of diamond compound, thoroughly clean the mold surface to remove all residual particles of the previous grade. This is usually done with clean tissue paper or cotton and a very refined oil or alcohol. Don’t use the brushes and felts used with one grade compound on the next grade of compound.
These steps—brushing, felting and cleaning—should be followed with each grade of diamond compound to arrive at the final step. Polish the surface with fine tissue paper, felt sticks or cotton swabs with an ultra-fine grade of compound to arrive at the final high gloss luster.
Summary
There are no short cuts when polishing a mold. Since a high degree of technique, even art, is required, it often takes years to become a proficient polisher. Obviously, no article or list of tips can take the place of individual training under the guidance of a master craftsman. However, following the fundamental pointers outlined in this article can provide a good head start on learning this highly specialized skill and creating outstanding metal surfaces.


Related Content

How to Determine the Proper Vent Depth
Vent depth is critical to optimizing mold performance, so here is one approach to finding that elusive right number.
Read More
How to Eliminate Chatter
Here are techniques commonly used to combat chatter and guidelines to establish a foundation for optimizing the moldmaking process.
Read More
How to Achieve the Best Mold Finish
A look at factors that impact the polishability of tool steels and recommendations for obtaining a high-gloss finish.
Read More
Why Choose a Valve-Gated Hot Runner?
Moldmakers need to be aware of how different gating technology can affect their customers when designing a hot runner system into a mold.
Read MoreRead Next

Take the Guesswork Out of Mold Finishing with Micropolishing
A look at the value to the mold build process of a microscopic mold finishing process that uses ultrasonic polishing.
Read More
How to Use Continuing Education to Remain Competitive in Moldmaking
Continued training helps moldmakers make tooling decisions and properly use the latest cutting tool to efficiently machine high-quality molds.
Read More
Your Guide to Smarter, Faster Mold Design
Dive into expert-curated content delivering proven solutions for mold optimization, manufacturability and precision performance.
Read More