


High-quality, smooth surfaces are essential in mold manufacturing. Customers insist on it, but the processes for achieving these surfaces are costly and difficult. Polishing is one such finishing process that requires abrasive rubbing or a chemical action to produce a smooth, shiny surface and to diffuse reflections. The challenge for moldmakers is the labor-intensive nature of these operations that are completely dependent on the personal skill and expertise of an experienced mold polisher. The bottom line is that polishing requires a lot of time and skill, is prone to costly errors and delays and causes frustration.


An unpolished, milled surface that is magnified 1,000 times has the appearance of miniature peaks and valleys. To reduce this roughness, a polisher rubs the surface using coarse grit, then progresses to finer grit and eventually buffs with compound pastes. Repeated abrasive rubbing over the surface literally “wears” the peaks down until they are flat or shallow hills, and the surface becomes smooth. A polisher uses hand stones, emery cloth and honing compounds to achieve the required grade of smoothness.
However, since the polisher physically removes the material in this process, the polisher often compromises the dimensional outcomes and surface geometries, rendering them “unknown” and impossible to repeat. Control over the finished product is lost. Surface inspection becomes a subjective opinion and can lead to customer disputes or dissatisfaction. What is more, overworking the surface can lead to defects, such as orange peel, scratching and pitting. Polishers must take great care to avoid these flaws.
Many mold manufacturers today address these risks by finish-milling the surfaces as smoothly as possible to minimize or eliminate hand polishing. Cusp height, or the distance from the top of the microscopic “hill” to the bottom of the “valley,” is a measure of the milled surface roughness and is recorded in micromillimeters or microinches. A general rule is that the closer the milled pitch distance is from sidestep to sidestep, the lower the cusp height will be. Ball nose endmills with larger diameters also reduce cusp height at the same pitch since cutters with larger radii produce wider tool paths.
In theory, this method makes sense. However, in practice, it is a costly exercise because these cutting operations require a lot of machining time and use accurate, rigid, expensive machine tools with high spindle speeds, feeds and processing capacity. These cutting operations also require expensive consumable cutting tools that actually “cut” the steel as opposed to simply sliding, scraping or dragging them over the surface. Also, the use of improper cutters can cause surface defects. Simply put, cutting alone can never achieve perfect smoothness. So, despite the best final milling practices, polishing remains a necessary finishing process for achieving customer-required surface qualities.
Nevertheless, moldmakers today can choose a different polishing strategy. Automated technology that is capable of enhanced surface quality can replace manual polishing. This mechanized system also facilitates faster milling operations, which reduces costs and accelerates job completion.
Automated Polishing
Peening is the process of working a metal’s surface to improve its material properties, using mechanical means, such as hammering, blasting with shots (shot peening) or blasting of light beams (laser peening).
Peening itself is not a new treatment, as Ancient Egyptians practiced it to improve the strength and durability of their chest armor and spear tips. They understood that a cold-working process produced better results than heat treating their metals. Today, this process uses automation to hammer and control each point of impact. An electronically-controlled hammer head produces machine-hammer peening, and a CNC machine or a robot controls the head positioning, executing CAM software that is programmed specifically for peening applications.
An electronically-controlled hammer head produces machine-hammer peening, and a CNC machine or a robot controls the head positioning, executing CAM software that is programmed specifically for peening applications.
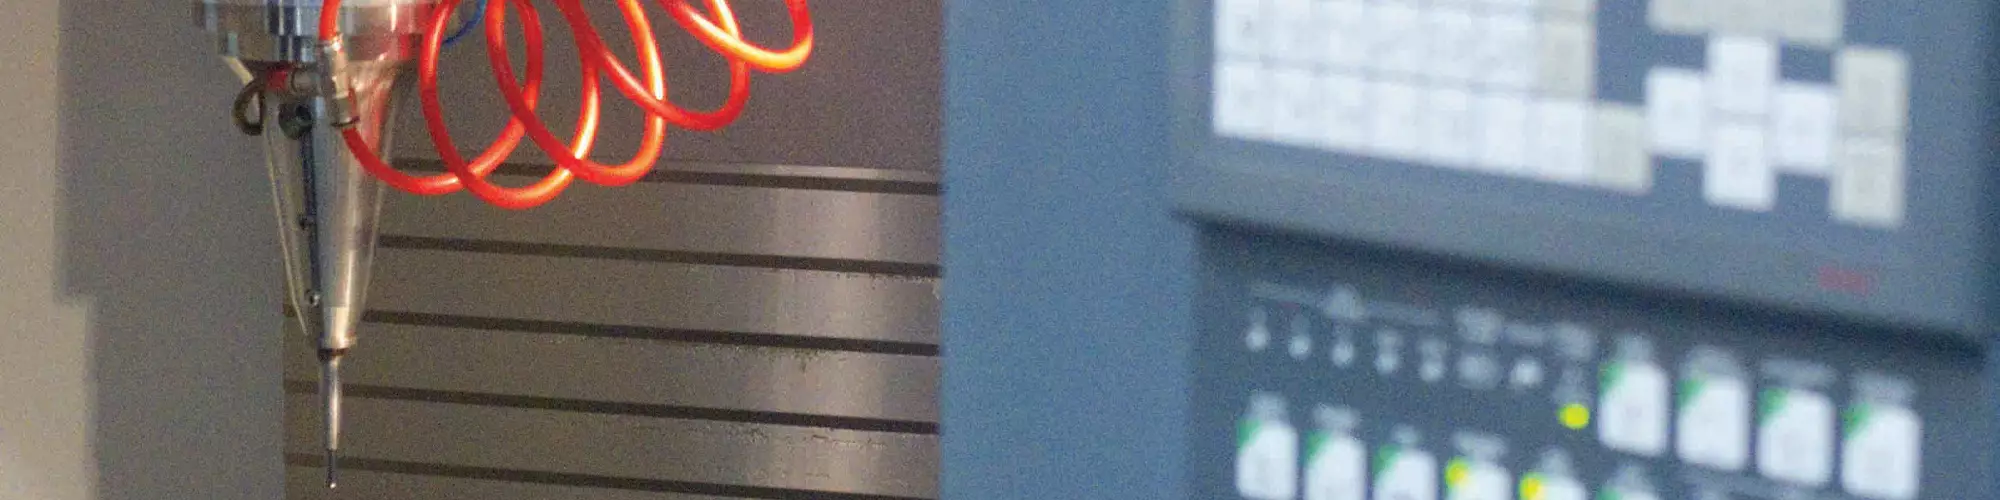
A separate moveable console unit on rollers contains a computer and a 110-volt power supply that converts DC for the hammer head. Electromagnets in the conical-shaped head create a powerful Lorentz force (or the force exerted on a charged particle moving with velocity through an electric and magnetic field), which causes the striker tool to reciprocate rapidly when placed against the workpiece surface. This produces the hammering action. The metal strikers have spherical tips and range in size from 1–25 millimeters in diameter. These interchangeable strikers are the actual tools that hammer on the surface. Both the impact force and the hit rate (or the frequency) are variable, generating up to 180 kilograms of force per strike and 500 hits per second. A flanged adapter fastens the head to the CNC machine, and that is where the head’s position is manipulated by programmed axis movements against the workpiece surface. The CNC machine controls the feed direction of the head on the surface. The direction is usually perpendicular to the previously milled toolpath.
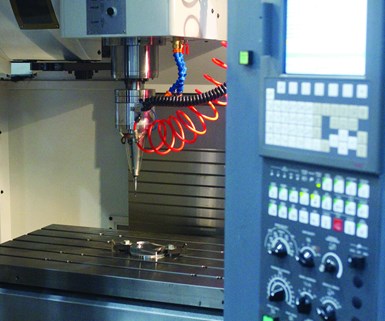
System components for machine-hammer peening include the peening hammer and striker, spindle adapter, flex cable, air hose, computer, CAM software, control console, handheld pulse generator, machine tool and workpiece. Images courtesy of Accurapuls Canada Inc.
This peening process creates smoothness on the surface by flattening the material peaks into valleys. The material flow that radiates beneath the surface achieves a perfectly smooth outer surface that is uniformly polished, avoiding any need for hand finishing. Technically speaking, peening can reduce the cusp height as much as 0.075 micrometer. That is, 0.000075 millimeter or 0.000003 inch, which is equivalent to anything that can be produced by hand. At the same time, this process enhances the surface by mechanically increasing the hardness and imparting residual compressive stress into the outer layer, which produces a more durable surface that is less prone to fatigue, wear or micro-cracking.
Additionally, since the hammer produces considerable strike force, the final milling pitch and the corresponding cusp height before peening could be much coarser than if hand polishing were to follow. Typically, finishing pitch distance can be doubled or tripled, reducing finish milling time by 50-60 percent.
Machine-Hammer Peening Benefits
For most jobs, an automated polishing solution is ideal. Moldmakers save a great deal of time and money, they rely less on experienced hand polishers, and they eliminate the risks from overworking surfaces. Justifying its use on larger surfaces, such as door panels and dashboards, is easy, but even fine details and radii are effectively polished using the smallest 1-millimeter diameter striker. Occasionally, certain spaces like deep ribs or similar features on grill molds, for example, may restrict striker access because they are difficult to reach. Those areas may still require hand work. However, even in those cases, combining the automated system with hand polishing will save time.
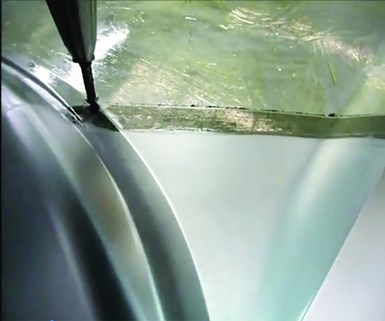
Machine-hammer peening is applied through the operation of a controllable electro-magnetic hammer head imparting rapid reciprocal motion of a striker ball against a workpiece surface. This image demonstrates the before and after of a mold surface being peened.
Automated hammer peening offers process control, decreased processing time, and reduced or eliminated manual polishing and overwork defects. These benefits are possible because the surface geometries are maintained with proprietary CAM software that controls the CNC machine for peening operations on 3D geometries, ensuring predictable and repeatable results. Code is generated from parasolid files for the workpiece. The software recognizes special features, such as sharp corners and pin holes, keeping them safe from damage. Impact force and frequency parameters are also regulated during set up. The entire peening process is automated, design data is preserved, and finished results meet simulation predictions every time.
A single workpiece setup for milling and peening can save substantial processing time. Moldmakers can complete finish-milling operations 50 percent faster when peening follows, and they can substantially reduce or eliminate manual polishing. For example, a hardened P20 or H13 steel mold that is finish-milled using a 6-millimeter ball mill at a feed rate of 6 meters per minute with a 0.1-millimeter pitch distance and then peened for polishing using a 6-millimeter striker at a feed rate of 6 meters per minute and the same 0.1-millimeter pitch distance will produce a perfectly smooth, finished surface. The combined time and cost savings could be up to 100 hours or more of man- or machine-based labor, depending on the job.
About the Contributors
Thomas Pickhardt
Thomas Pickhardt is president and technical director of Accurapuls Canada Inc.
Brian Guild
Brian Guild is vice president and communications director of Accurapuls Canada Inc.


Related Content

MMT Chats: Eliminating the Noise to Stay Focused on the Customer
Metro Mold & Design joins me to discuss the value of the 80/20 rule as a business strategy, its talented cross-functional team, the role of automation in mold building and molding, and the continuing impact of COVID-19.
Read More
Confronting the Mold Design Talent Drought
Recently, I reposted on LinkedIn the results of an informal survey we conducted, which revealed a shortage of skilled mold designers. It quickly gained a lot of traction. Given the response, I thought I'd summarize the feedback and keep the conversation going.
Read More
The Role of Social Media in Manufacturing
Charles Daniels CFO of Wepco Plastics shares insights on the role of social media in manufacturing, how to improve the “business” side of a small mold shop and continually developing culture.
Read More
30 Under 30: The Next Generation Reshaping Moldmaking
Young professionals are bringing new perspectives, technical skills and strong commitment to the moldmaking industry. MoldMaking Technology recognizes these individuals through our 30 Under 30 program, highlighting emerging talent helping to shape the future of precision manufacturing.
Read MoreRead Next

Automated Polishing: Commonly Asked Questions about Peening
Peening itself is not a new treatment, but that doesn’t mean it is fully understood. Peening is the process of working a metal's surface to improve its material properties, using mechanical means, such as hammering, blasting with shots (shot peening) or blasting of light beams (laser peening). Here are some commonly asked questions regarding the process.
Read More
Conventional Polishing Versus Ultrasonic Polishing
Determining when it is financially smart to consider using an ultrasonic polishing system to reduce finishing time.
Read More