Across The Bench
In this new column, real world mold maintenance issues are discussed and tips to competing in a fast-paced environment are given.
Welcome to Across the Bench, a series of upcoming articles directed at improving efficiency in your tool room and the performance and health of your molds. During the next few months, this column will cover real-world maintenance issues that occur from both the hands-on and administrative sides of a bench. These issues will range from tips and techniques used daily in the actual performance of the job to more introspective subjects such as dealing with aptitudes and attitudes, promoting craftsmanship and improving communication in a fast-paced and competitive maintenance environment.
Data use, craftsmanship and teamwork on mold performance and maintenance efficiency are indeed measurable. In upcoming articles, I hope to show how this can be accomplished.
A Tooling Removal Tool
Removing and installing critical, close-tolerance tooling for cleaning, inspection or replacement is just one of the many jobs mold repair technicians perform on a daily basis. The manner in which this tooling is removed and installed can have a huge impact on the normal wear patterns that technicians look for during mold repair and troubleshooting procedures. It is imperative that the methods of removal do not change the appearance or physical aspects of normal tooling tracks or cause undue damage that could render useless a root cause analysis of a particular mold or product defect.
There are two important factors to consider, when removing and handling tooling-timing and technique.
Timing
- Specific tooling should be removed only after troubleshooting a particular defect that has occurred. It is much easier and quicker to find the suspect tooling, visualize mold function and troubleshoot defects with the tooling still located in the plates. If you remove all the tooling before you troubleshoot, then you have to sort through all the tooling to find the piece in question. And if all the tooling is not numbered correctly, then the correct piece needed to implement repairs may not be found. It always pays to minimize the risk of accidental damage by reducing the number of times tooling is handled during cleaning and repairs.
- Thorough cleaning of the tooling should only occur after the cause of the defect has been discovered or this tooling has been ruled out as a probable cause. In some cases, tooling will need to be removed and cleaned so physical measurements of shut-off areas can be taken and compared to print dimensions. Experienced repair technicians can 'read' tool tracks left behind on critical tooling wear surfaces such as the amount of vent residue, corrosion, grease, plating wear, discoloration, small track lines, hobbing, galling, etc. created during a production run.
Technique
- Regardless of how accurate you believe you are with a hammer, never, ever use a steel ball peen or claw hammer to remove tooling. One misplaced swing can cost hundreds if not thousands of dollars in damage. If your molds are routinely cleaned, then removing tooling will not require a sledge and a round-house, two-handed swing.
- Soft brass or copper punches are acceptable in most cases although my preference is nylon or plastic. More critical is the sizing and placement of the punch that is being used. Some technicians who are under the gun will be tempted to use short lengths-six inches or so-of brass rod, that comes in standard sizes for removing inserts without taking a few minutes to properly size the working end on a lathe. The thinking is, since brass is obviously softer than the hardened steel insert, you can size a punch to a particular hole by just driving it in, and shaving a few thousandths off the brass punch diameter. I have done this, and worse, and know how easy it is to shortcut a professional approach when being pushed to get the mold back into production.
- Never mix up mold tooling. Tooling, especially when located by dowels or flats to a specific orientation, has a tendency to take a seat during production. A seat is a distinctive running fit that develops between two or more pieces of close tolerance tooling. Disturbing this running fit makes it impossible to forecast tooling life and complicates troubleshooting. Tooling should always be numbered and returned to a home position during a C/R (clean and repair).
- Always be in complete control of tooling being removed. Some molds may have several cavity inserts stacked inside housings that will shoot out onto the bench if not controlled. Cavities and cores containing O-rings will feel tight upon initial movement, but then practically fall out of the bore when backed out a short distance.
- Tooling should be handled and stored or placed in such a manner that protects critical sharp edges from inadvertent bumps or drops. Take the time to fabricate wooden or plastic trays to store tooling that must be completely removed from mold plates for cleaning. Tooling should be carefully placed or arranged in cleaning baskets and not thrown in haphazardly.
- Ask for help if you are unable to completely control tooling when removing it. Have a partner or enlist a helper to catch the tooling as it is removed from the plate. The downside of this approach is that removing many pieces of small tooling should not be a two-man job; repair efficiency is enhanced by designing specific tools for specific applications.
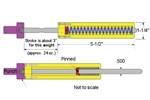
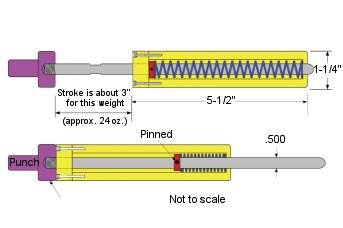
This brings us to the tool. In the next issue I will explain how to fabricate a slick little slide hammer that can save you time, money and frustration when removing tooling.
| The Black ART |
| Mold maintenance is considered a black art because there are very few formal training programs for repair technicians or management to attend in which to study standard practices and procedures. There is no mold maintenance bible available to consult when a mold oozes plastic from the top of the electrical box during a critical production run. Proactive, predictive and preventative normally surround anything mechanical in the industry and until mold maintenance is understood, knowing how to make them work will remain a mystery.
The range of perceived qualifications in the industry is incredible. Many employers aren't sure what background prospective repair technicians should have, while employees are getting bogged down and burned out. Poorly equipped shops fill up with half-assembled molds waiting on tooling that should have been in stock, molds victimized by unnecessary and costly mistakes or molds that are run to death. Backup molds are never available. It's easy to understand why freelancing repairs and firefighting hot problems are accepted solutions for many companies. Typical mold maintenance functions such as disassembly, troubleshooting, repairing, cleaning and assembling can and should be standardized, formalized and followed by all shop employees. This will significantly reduce labor hours, tooling and defect frequencies, and in some cases eliminate specific defects, thus improving quality, performance and reliability of molds. An efficient mold repair shop collects and uses accurate mold performance and repair data while trained personnel work together in a well-designed repair shop. Quality craftsmanship can no longer be an elusive skill companies only hope their technicians have; it must be a requirement. Maintenance technicians must be held accountable. This can be accomplished by gradually shifting to a systemized approach to understand and correct mold and product defects. A shop's operation is in management's hands. Supervisors must be able to measure mold performance and repair criteria. As the old saying goes, 'You cannot improve on something that you cannot measure.' |
Related Content
Laser Welding Versus Micro Welding
The latest battle in finely detailed restoration/repair of mold materials.
Read MoreQuestions and Considerations Before Sending Your Mold Out for Service
Communication is essential for proper polishing, hot runner manifold cleaning, mold repair, laser engraving and laser welding services.
Read MoreHow to Maintain Heaters, Thermocouples, Valve Gates and Controls
An examination of real-world problems and solutions involving hot runner system maintenance.
Read MoreThe Ins and Outs of Hot Runner Temperature Control
A training checklist that explains the why and how of proper hot runner temperature control and system management.
Read MoreRead Next
Across the Bench: One-Man Solution
A tool specifically designed to make tooling removal a quick, safe, one-person job helps moldmakers get jobs done quickly and efficiently.
Read MoreAre You a Moldmaker Considering 3D Printing? Consider the 3D Printing Workshop at NPE2024
Presentations will cover 3D printing for mold tooling, material innovation, product development, bridge production and full-scale, high-volume additive manufacturing.
Read MoreHow to Use Continuing Education to Remain Competitive in Moldmaking
Continued training helps moldmakers make tooling decisions and properly use the latest cutting tool to efficiently machine high-quality molds.
Read More



_300x250 1.png;maxWidth=300;quality=90)


.jpg;maxWidth=300;quality=90)

.png;maxWidth=300;quality=90)




.jpg;maxWidth=970;quality=90)