


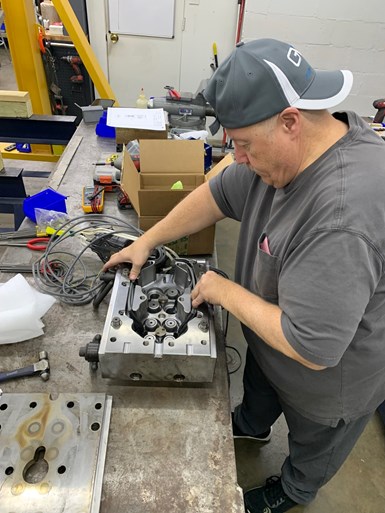
Inspecting electrical connections using an ohmmeter for heater and thermocouple functioning. Photo Credit, all images: PCS Company
Collaboration among the mold builder, hot runner supplier, molder and resin supplier is critical to design and build a hot runner mold. However, once a mold is delivered, much of what comes next is left in the hands of the molder/OEM customer, making collaboration even more vital when the mold is validated and in production.
Here are five tips to help with the initial startup of a hot runner mold, plus some guidelines to develop an effective preventive mold maintenance plan.


Tip #1: Gather the details and make a plan.
Following a detailed process for the initial startup of a mold — especially a hot runner mold — sets a mold up for success. Detailed preparation ahead of sampling is essential. Without it, there could be costly issues and delays.
The complexities of any mold will dictate the setup process. A hot runner mold will always require additional setup measures, including determining temperature ranges for the mold and nozzles, expected injection time and cooling time, mold open and close speed and so on. Total cycle time is critical because the resin — especially highly temperature-sensitive types — cannot remain in the manifold and nozzles for long or it will cause degradation. Plus, you need to pay special attention to a resin’s melt characteristics compared to a cold runner system because a hot runner manages more heated zones. The molder is responsible for obtaining all relevant data from the resin supplier to determine the proper processing parameters.
You can determine most of these factors in the design stage and get a checklist of basic steps for qualifying the mold and system from the hot runner supplier. Every molder or setup technician should have the startup manual and all mold specifics before mold setup to properly plan for the process.
The moldmaker must package these documents with the mold for delivery so that either printed material or digital versions are available before every startup. Today, with the rise of Industry 4.0, most of this information is stored in the cloud or on a company network, giving setup personnel direct access.
Tip #2: Follow a solid heat-up process.
Cold starts can lead to damaged needles, valves and some internal parts. The entire hot runner system may have to stay heated for 20 to 30 minutes after reaching the set temperatures on the controller before fresh material can be injected. Typically, hot runner suppliers recommend the exact duration and procedure.
Tip #3: Troubleshoot for that sweet spot.
A simple thermal gate system is straightforward to qualify. Perform a few cycles of low-pressure purge to fill the manifold and nozzles and remove air traps.
When starting a valve gate system, dry cycle all the gate sequences in the mold to verify they are functioning in the correct order and then perform the purge. Valve gate systems require additional procedures requiring more time and expertise because the sequence of operation is critical (even more so with sequential valve gate systems).
Some resins are highly sensitive to temperature and shear. Setup personnel should be aware of such limitations. Support from the material supplier is recommended.
During tryouts, experiment to see where the production “sweet spot” is for that mold and look for opportunities for fine-tuning to consistently achieve good part quality and faster cycle times.

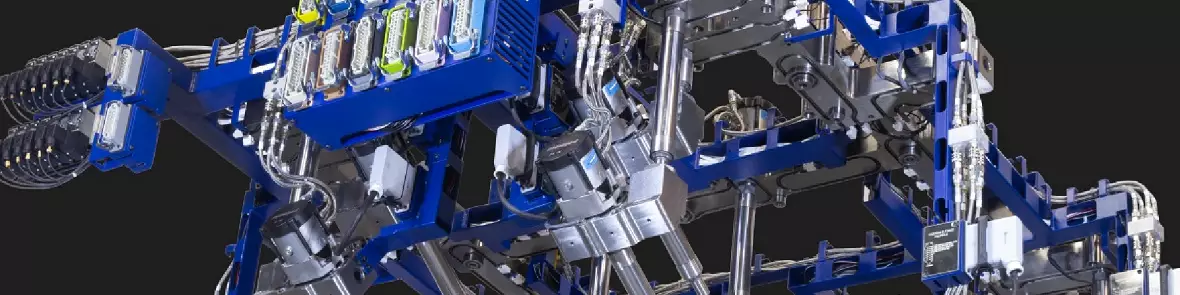
(1) Nozzle tip area, (2) nozzle seating area, (3) pin seal, (4) manifold end plug, (5) feeder bushing seal area, (6) machine nozzle seating area, (7) lower support pad and (8) upper support pad.
Tip #4: Train for the system.
Train personnel running the mold on the importance of the hot-half interface and the sequence of the hot runner system and mold operation. Strict adherence to all procedures will prevent unnecessary damage to the mold and systems. Training for safe handling is a must.
Train technicians to open and close valve gates to ensure proper function before injecting any plastic. In one instance, a molder hooked the valve gate system up backward so that when the mold was closed, the valve pins shut the gates, and when the mold opened, the gates were opened. Plastic leaked because the technician was not properly trained and did not follow the setup process for that mold and hot runner system.
It is equally important to check that the waterlines are properly hooked up. Waterlines within the hot half help minimize the heat radiation from the hot runner back into the mold. An overheated hot half can lead to thermal expansion greater than what was accounted for in the design. Valve-gated systems can seize when temperatures exceed what the seals are rated for, making it vital that the molder prepares for these critical checkpoints in the initial setup.
Early detection of leaks can save thousands of dollars in repairs and reduce downtime. New developments with smart temperature controllers and leak detectors help achieve this goal.
Tip #5: Be proactive about preventive maintenance.
Prepare a preventive maintenance (PM) plan to optimize production and avoid unwanted downtime and expense. You can develop an efficient plan using the hot runner system and mold data and working with the hot runner supplier and/or mold builder.
Consider the following six guidelines when developing any preventive hot runner mold maintenance plan:
-
Frequency
- Inspect the mold and hot runner system every 6 months or so. This requires separating the mold plate(s) from the hot runner system.
- If using a valve gate system, inspect every 3 months.
-
Mechanical components inspection
- Inspect needles and nozzle tips for wear. Are there broken or rounded/blunt edges? Be sure to inspect threads if you suspect damage.
- Always refer to the hot runner manual for proper nozzle tip removal and installation procedures.
- When installing tips, use silver-grade, anti-seize lubricant on the thread. When running medical or food-grade parts, verify if the anti-seize is FDA approved. Apply correct torque.
-
Electrical inspection
- Conduct a visual inspection of the wiring for loose connections and damage. Look at connectors to check if pins are bent or pushed back.
- Check heaters and thermocouples to see if they are loose or out of position. When plastic leaks occur, it is not uncommon to see them displaced or damaged.
- Use an ohmmeter to determine if heater performance meets specifications.
- Using the ohmmeter, check if the thermocouples are functioning.
-
Resin leak detection
- Check for material leakage. If a leak is suspected, run an odd color material for 10 minutes before shutting down to help visually trace the leaks. The new color can be seen close to where the leak originates.
- Find the root cause of the leak by inspecting the following:
- Nozzle tip area.
- Seal-off between the nozzles and the manifold. Check seal rings, if present.
- Pin seals (between the valve pin and the manifold) in valve gate systems.
- Areas around the manifold end plugs.
- Interface between the feeder bushing and the manifold. Sometimes, damage to the nozzle seating area on the feeder bushing can also lead to plastic leaking into the hot half.
Checking for seal-off conditions within the hot half. Impression of upper support pads can be seen on the top clamp plate on left side.
- Correct the leak using the following steps:
- If the tip area leaks, inspect the tip and the bore in the mold cavity. Correct or replace the part that is out of spec.
- Verify that the manifold is seated evenly on all nozzles. They should be within 0.001 inch or so, according to manufacturer specs. Check with a height gage and dial indicator.
- Check the height of all lower support pads.
- Inspect the manifold for its flatness or hobbing on the nozzle seating side. Correct if necessary.
- Install the manifold onto the nozzles, then use a height gage to check the upper support pads to ensure they are within manufacturer specs.
- Inspect the top clamp plate and look for any sign of hobbing caused by the manifold’s supports. If excess hobbing is observed, regrinding the top clamp plate may be necessary. A deformed top clamp plate could also lead to leaks, which should be verified and addressed.
- Secure support from the moldmaker or hot runner supplier to correct manifold leaks and other undeterminable causes.
- Replace tips and needles at least after 12 months of use or sooner, as indicated by the hot runner supplier.
- Replace valve pins, valve pin seals and piston seals after 12 months of use or sooner per recommendation from the hot runner supplier.
- Keep spares of these perishable components to reduce downtime.
-
Piston leak detection
- Look for oil leaks in hydraulic systems and test for air leaks in
pneumatic systems using a pressure gauge.
- Have spare seals on hand.
-
Purge
- Periodically purge the hot runner system with natural, unfilled material or purging compound, which helps keep the flow channels clean and minimizes buildup of degraded resin.
Early detection of leaks can save thousands of dollars in repairs and reduce downtime. New developments with smart temperature controllers and leak detectors help achieve this goal.
As they say, an ounce of prevention is worth a pound of cure. Always plan well for a successful launch, followed by a solid PM procedure.


Related Content

What You Need to Know About Hot Runner Systems and How to Optimize Their Performance
How to make the most out of the hot runner design, function and performance.
Read More
How to Use Thermal Management to Improve Mold Cooling
A review of common mold cooling issues and possible solutions, including 3D printing applications.
Read More
Products and Services for Multiple Moldmaking Needs
New year, new technology roundup! Featured here is a collection of product offerings, from profile milling cutters to industry-specific CAD/CAM software to innovative hot work tool steels.
Read More
How to Maintain Heaters, Thermocouples, Valve Gates and Controls
An examination of real-world problems and solutions involving hot runner system maintenance.
Read MoreRead Next

How to Build a Better-Performing Hot Runner Mold
Early stage communication across the supply chain about design considerations optimizes hot runner mold performance.
Read More
Solving Mold Alignment Problems with the Right Alignment Lock
Correct alignment lock selection can reduce maintenance costs and molding downtime, as well as increase part quality over the mold’s entire life.
Read More
VIDEO: Taking a People Before Product Approach to Growing a Business
Angela Elsey, President of PCS Company, shares her journey into moldmaking, perspective on the industry and plans for the business.
Read More