Mold Rebranding and Refurbishment
When identifying features have to be changed, this five-step welding and engraving process can spare the expense of building a brand-new mold.
The plastics landscape is in a constant state of flux, as new companies pop up, some fall by the wayside, and others consume small and mid-sized facilities and product lines. This can create challenges when product lines, materials and molds change hands: namely, in rebranding.
Rebranding might include changing a product name, part number or any identifying mold features when the new owner wants a logo or tool change, or when a product line is moved to a new facility. This could be a multi-vendor process, as it might require a shop to either make a new mold or weld the existing one; a shop to re-machine the mold; and a shop to polish, engrave and finish-polish or texture it—all just to update the logo and ID numbers. When a change in mold brand is called for, and the decision has been made to weld the existing mold, it can be daunting to tackle the associated problems quickly and expend the least amount of capital possible. However, if all the required steps can be performed within one facility, the following five guidelines can simplify the process:
1. Evaluation and cleaning. This step, although time-consuming, is an essential one. Proper cleaning of the existing mold will remove any contaminants and/or non-metallic coatings that can complicate welding and engraving. It also can reveal previously undetected problems, cracks and damaged parting lines. This also is a great time to inspect wear surfaces and important shutoff dimensions so they can be repaired in the other four steps of the rebranding process. This first step is potentially the most critical in the mold repair process, because it will help the shop determine the viability and cost of repairs and changes so it can weigh those costs against those of creating a new mold. Continued research and development in welding technology has yielded more flexibility in repairs and decreased costs, along with the ability to produce a like-new product.
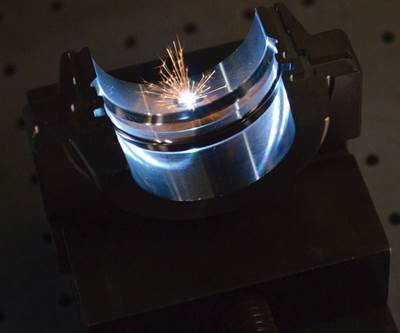
2. Welding. If, after cleaning and evaluation, the decision is made to weld the existing mold, the appropriate welding process must be selected. Often, for simple, non-catastrophic repairs, laser welding is the best option. This process produces less of a heat-affected zone and very little sink, enabling the operator to weld an engraving or marking without the need to weld the entire surface of the mold. This saves time in welding, as well as in the next steps of the rebranding process. TIG and plasma welding, although useful, add more material than necessary and can damage the base metal with the heat they produce. Also, because laser welding does not require pre- or post-heat treatment, there is no additional time needed in the process for the part to heat or cool. What could take hours in setup, prep and welding, takes only minutes with this process.
3. Machining/polishing. Machining or polishing immediately following welding removes any weld buildup, which should be extremely small if laser welding was used. The accuracy of this type of welding typically produces only 0.001-0.003-inch buildup above the required dimension, and this can be polished off rather than by more time-consuming machining using a CNC mill. When welding material is applied to a surface at high volume, a CNC or hand-operated mill typically is used to remove the buildup, but subsequent polishing will still be necessary to achieve the proper final finish.
4. Laser engraving. Once the mold to be rebranded has been cleaned, welded and polished, laser engraving can occur. This process can be used to produce virtually any etchings, from simple bar codes and other markings on parts to part numbers and 3D logos on molds. A laser with a mirror galvanometer head engraves to depths ranging to 0.0001-0.040-inches. This versatility makes it easy for the operator to replicate location and data during rebranding, picking up unchanged details and placing new logos and data in the same locations. Basically, after the engraving is welded and polished, the system uses another feature (for example, a flat marker) as a way to locate the new engraving.
This is also an ideal time for the operator to touch up unchanged engravings that may have been washed out or damaged, using the laser engraver to sharpen edges and make the engravings crisper, and returning the mold back to its optimal running condition. Additionally, laser engraving can cause small, micron-sized burrs and these burrs commonly are removed by draw polishing, a type of basic polishing that employs a back-and-forth motion in the direction of part ejection instead of a circular or elliptical motion.
5. Finish-polish or texturing. Finally, after these four steps, it is time for any final polishing. Whether there is a need for a finish polish depends on the molder’s requirements. A simple draw polish may be sufficient, or a diamond finish may be required. Typically, clear plastic parts receive a diamond polish, so that defects or problems will not be visible on the plastic surface. Draw polishing is more commonly used on opaque plastic parts. Sometimes the customer wants texturing across the entire mold surface, and this can be accomplished using either laser ablation (engraving) or acid etching.
Rebranding a mold by following these five steps can help eliminate the costs and time associated with building a new mold. Refurbishing the rebranded mold components while they are out of the mold and repairing or touching up flashed shutoffs, parting-line dings, crushed or hobbed areas, damaged gates, or operationally damaged molding surfaces will save a shop even more money and increase mold life.
Related Content
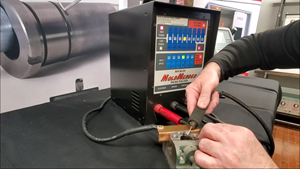
Portable Low-Heat, Non-Arcing Resistance Welder for Mold Repair
Rocklin’s user-friendly MoldMender Micro Welder delivers simple and cost-effective localized repair in-house with precision and versatility, enhancing mold and die durability and reducing disassembly and downtime.
Read MoreMoldMaking Technology's Most-Viewed Content 2022: Products
MMT shares the five top-viewed technologies, equipment and services of 2022 in each Engineer, Build, Maintain and Manage tenet based on Google Analytics.
Read MorePrecision Welding Services Offer Rapid Turnaround Mold Repair and Reduced Molder Downtime
X-Cell Tool & Mold relies on outsourced, high-quality welding repairs from Lewis-Bawol Welding to ensure its customers' molds are back in production quickly and affordably.
Read MoreWhat You Need to Know About Hot Runner Systems and How to Optimize Their Performance
How to make the most out of the hot runner design, function and performance.
Read MoreRead Next
A Case of Good Engraving
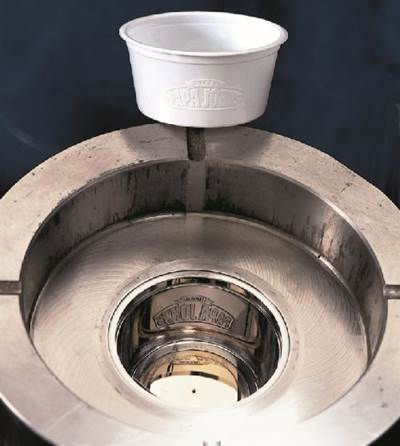
Plastic, pizza and Papa Johns. Here's a brief story about how one laser engraving and polishing company saved its customer time and money with the right engraving strategy.
Read MoreLaser Engraving Boosts Welder’s Capabilities
The addition of laser engraving services has boosted this Ohio welding company’s business by about 10 percent.
Read MoreReasons to Use Fiber Lasers for Mold Cleaning
Fiber lasers offer a simplicity, speed, control and portability, minimizing mold cleaning risks.
Read More






.jpg;maxWidth=300;quality=90)
