
Maintenance Matters: Got Flash? Shim it!
In some cases, shimming is the most cost-effective, short-term method for adding a bit of steel right where its needed to get through a critical production run.
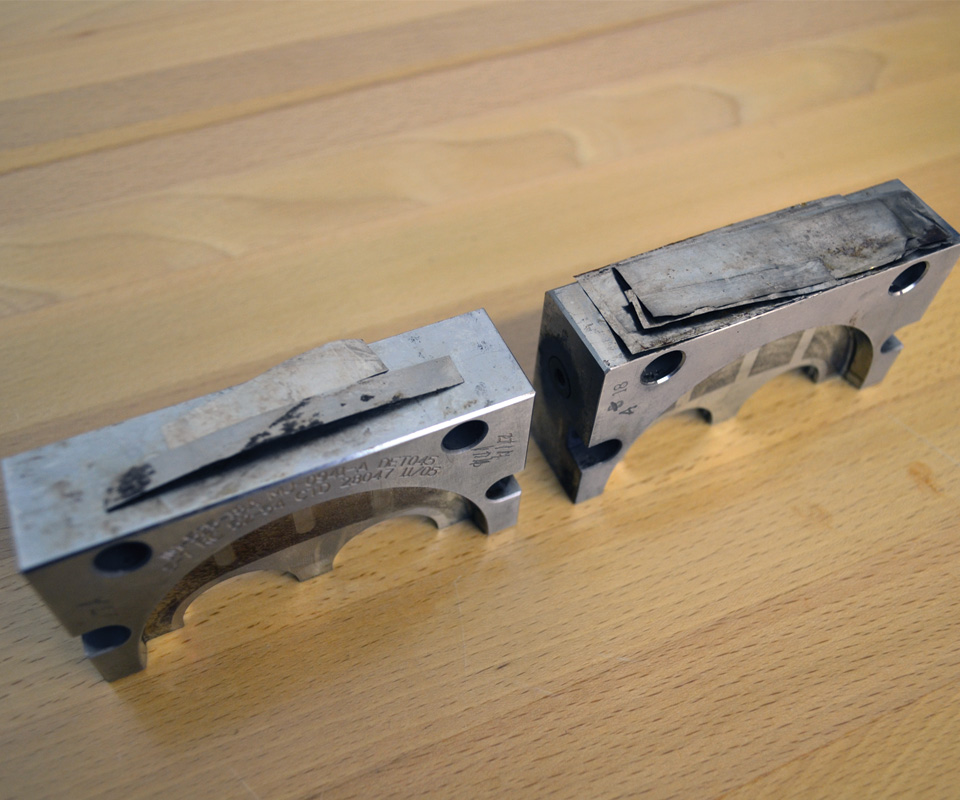
Figure 1 - Stacked shims of varying sizes and thicknesses can easily get mixed up during routine cleaning and maintenance, or installed out of position when assembling the components. Cut one shim to the correct size that totals the thickness of all the thinner shims. Images courtesy of MoldTrax Maintenance Solutions.
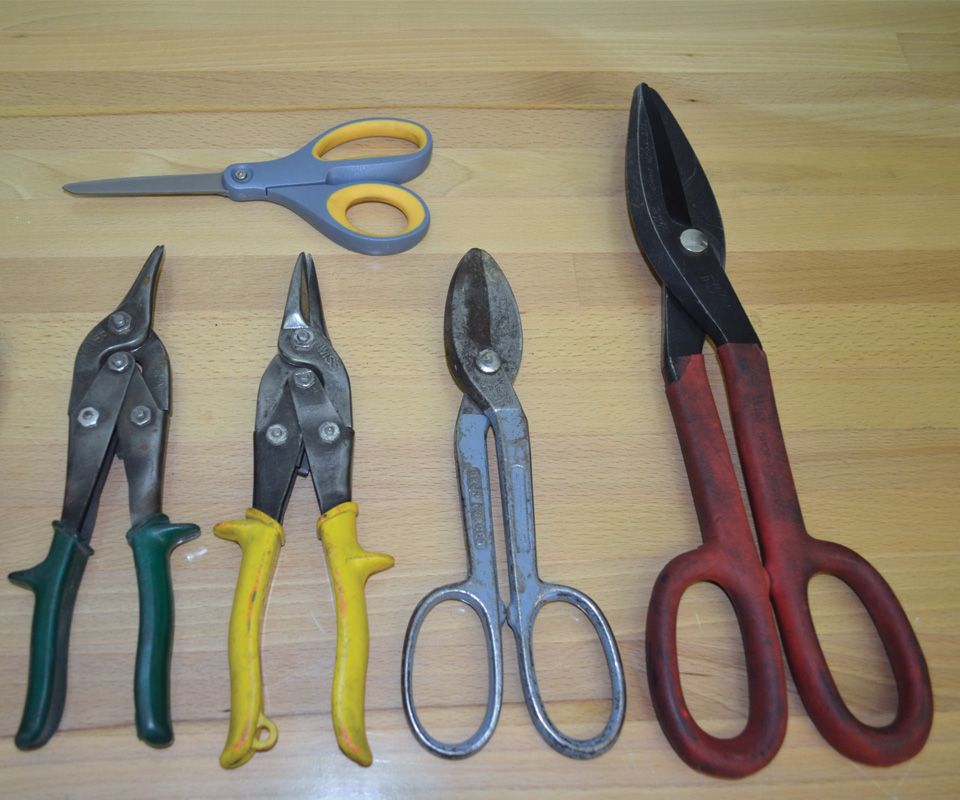
Figure 2 - Many types of shears or tin snips are used to cut shims. If they are dull or worn, they will roll/deform the edge of a shim instead of leaving a clean, sharp edge. A pair of standard scissors works well for thin shims of 0.003 inch or thinner.
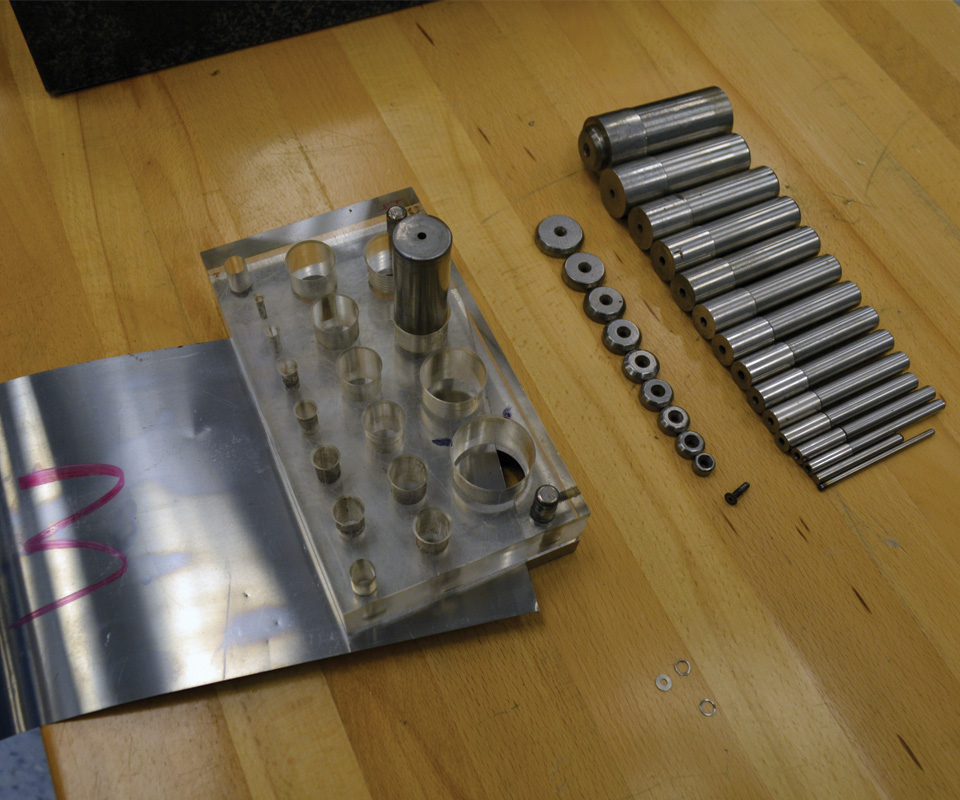
Figure 3 - A set of (author-built) shim punches makes cutting round shims a snap. The removable pilot on the end of the punch aligns the inner and outer diameter when cutting donut-type shims.

Figure 4 - Here is an example of what can happen when using stacked shims. This shim (part of a stack) was installed out of position. This could cause the O-ring to leak and also shift the cavity block that fits in this pocket out of position by holding the block away from the wall of the pocket. The shim almost interferes with the O-ring, which would have effectively shut off water flow to this cavity block. This is a perfect example of why shimming gets a bad rap.


Nothing rankles the meticulous toolmaker like finding a shim stuck somewhere in a mold to fix flash. For many who don’t work on the front lines of mold repair, just mentioning it as a possible repair might get you a raised eyebrow, a disparaging comment or even termination. However, in some cases, shimming is the most cost-effective, short-term method for adding a bit of steel right where its needed to get through a critical production run.
In fact, shimming was a necessity on many of the high-volume, close-tolerance molds I have worked with. For example, I have used a shim to apply a bit more pressure at a parting line to fix flash, and this returned the mold to production much sooner than if the mold had been pulled and the flash corrected “properly.” Properly, in most cases, entails stacking out the tooling to determine the correct shutoff height, then reworking, welding or plating the mold to maintain the appropriate (designed) parting line pressure.


Other times, the necessary new tooling was not in stock, and a properly sized, cut and placed shim extended mold life for thousands of extra cycles or parts. Yes, there are some molds, even new ones, that because of poor design or build just won’t run without a variety of shims added in critical areas. That’s just the way it is. But the implications surrounding shims are seldom positive.
There are several reasons for this. Shims can do more damage than good if not properly sized, cut and installed, and they can fall out of position during mold disassembly. They can also be a substitute for a lack of repair knowledge if you have a shimmer who does not know how to measure tooling stack heights or verify preload. This means that instead of measuring with precision tools to determine the cause of an incorrect shutoff height, the decision becomes “just stick a 0.005-inch shim in and see what happens.”. This is not a good way to correct an issue. Sticking shims in a close-tolerance mold to “see what happens” usually leads to more problems, such as crushed tooling, locked-up components or flash. Shims can also be dimensioned (thickness), sized (fit to sleeve or pocket), cut (using a dull tool) or installed wrong (slid under tooling and out of position), or documented improperly.
Oftentimes, multiple shims of varying thicknesses and sizes are stacked in a single location (see Figure 1) to attain the proper stack height. This clearly demonstrates a lack of interest in making quality shims. Shims should not be stacked. When using incremental thicknesses to sneak up on the necessary preload, cut and install one shim that is the total thicknesses of all of the thinner ones.
Shimming Steps
Although I do not discredit shimming when it is deemed necessary, I do encourage training on the proper way to shim and to make the repair more permanent with welding or plating when a mold goes down and time is available. Here are the recommended steps for shimming:
Determine the correct shim thickness. When working in the press, you don’t always know exactly which component, or combination of components, is the root cause of the flash. Measuring the thickness of the flash on the part will help determine the required shim thickness.
If it is a straight shutoff, this is a simple approach. If the shutoff is controlled by an angle or wedge block (heel block), the correct shim thickness will need to be calculated using basic trigonometry. Many websites, including phone apps, exist to help determine this calculation. Basic trigonometry application is a skill that every repair technician should practice, as many need help in this area.
Cut the shim. The objective is to cut a “nice-fitting” shim (see Figure 2). Nice fitting means the shim should just be slightly smaller than the pocket it fits into or the tooling it fits under. Round shims should also be cut slightly smaller on the outer diameter so as not to jam in the bores. Shims cut too large can also fold over, causing an incorrect thickness.
Another overlooked area in cutting shims is the type of tool used. The tool must leave the edges square and sharp for a precise fit. It pays to have a sharp shear when cutting 0.005-inch and thinner shim material. A dull set of large tin snips can roll the edge of a shim when you cut it, effectively doubling the shim’s thickness if it is not stoned or filed down flat.
If you have ever cut typical furnace/AC duct pipes, you are probably familiar with the red-, green- and yellow-handled aviation-type tin snips. The color indicates the correct cutting direction: red to the right, green to the left and yellow straight. These are useful when cutting a circular or curved shim that is larger than 2 inches.
Use long shears to cut straight lines and a straight edge with a razor knife for really long shims of 12 inches or more. If you are cutting thick shims in the 0.020-inch range, aviation snips are much easier to use. Their extra pivot point and serrated edge help to pull the shim into the cutter. When cutting shims thinner than 0.005-inch, regular carbide scissors work well and leave a smooth edge. You can also use a razor knife.
A standard shim die punch set is great for cutting round shims. A regular dressing on a surface grinder will keep the punch and die set sharp. However, as mold components (sleeves, cores and other round tooling) are not always built to standard sizes, the lack of the correct diameter might require the shim to be trimmed by hand for a final fit. So if you shim often, it will pay to build your own set of dies (see Figure 3). If standard-diameter, off-the-shelf dies will work for you, make sure to get them with the removable pilot plugs on the end of the punches. They keep “donut” type shims concentric in hole locations.
Install the shim. Sliding shims under tooling, especially if there is a chance that another shim might already be in that location, is not a good idea. This could push any pre-existing shims forward and out of proper location (see Figure 4). In most cases, it is best to remove the tooling for a clear view of what you are shimming, place the shim where it needs to go, then re-install the tooling.
To hold a shim in place until the tooling is installed, use a light coating of grease. Spot-welding or tacking the shim with small welders is another option, but it takes a fair amount of skill to not leave excess material. You do not want to make the welded shim too thick, because it will require grinding, which complicates the shimming process.
Always correct shims that are exposed and sticking out from underneath tooling. This not only shows poor workmanship, it could interfere with the mold closing and will cut unsuspecting fingers when the mold gets pulled and handled on the bench. Lastly, always document the type of shim, its thickness, the date of installation and the reason for use in your maintenance manual.
Regardless of your opinion on shimming, it is oftentimes the most efficient way to return a mold to production quickly. The shimming stigma is sustained by how it is done, so training on proper tools and techniques is necessary.


Related Content

What is Scientific Maintenance? Part 2
Part two of this three-part series explains specific data that toolrooms must collect, analyze and use to truly advance to a scientific maintenance culture where you can measure real data and drive decisions.
Read More
Hands-on Workshop Teaches Mold Maintenance Process
Intensive workshop teaches the process of mold maintenance to help put an end to the firefighting culture of many toolrooms.
Read More
How to Use Diffusion Bonding to Optimize a Mold’s Thermal Performance
Joining dissimilar metals has tremendous potential for conformal cooling, but to successfully use diffusion bonding, a mold builder must understand the complexities of the interface and its effect on the chemical and thermo-mechanical properties of the bond.
Read More
Portable Low-Heat, Non-Arcing Resistance Welder for Mold Repair
Rocklin’s user-friendly MoldMender Micro Welder delivers simple and cost-effective localized repair in-house with precision and versatility, enhancing mold and die durability and reducing disassembly and downtime.
Read MoreRead Next

How to Use Continuing Education to Remain Competitive in Moldmaking
Continued training helps moldmakers make tooling decisions and properly use the latest cutting tool to efficiently machine high-quality molds.
Read More
How to Use Strategic Planning Tools, Data to Manage the Human Side of Business
Q&A with Marion Wells, MMT EAB member and founder of Human Asset Management.
Read More
Are You a Moldmaker Considering 3D Printing? Consider the 3D Printing Workshop at NPE2024
Presentations will cover 3D printing for mold tooling, material innovation, product development, bridge production and full-scale, high-volume additive manufacturing.
Read More