Avoid Chasing CNC Variability with CAM
Moldmakers who produce tooling for medical devices and many other high precision molded products have been under increasingly greater pressure to reduce the variability of tooling components manufactured on their CNC equipment. One way they attempt to do this is by carefully adjusting offsets in the CAM program to compensate for variations in their equipment’s volumetric accuracy. Sometimes this works, other times not. Either way, the toolmaker pays a heavy penalty.
All the time spent tweaking and re-tweaking the CAM program is a hidden cost, typically absorbed into general shop overhead where it cannot be accurately accounted for. In addition, the out-of-spec parts created during the tweaking process lead to costly scrap and rework. Using CAM in this fashion to create a program with machine-specific offsets also means that the program cannot be used on another CNC machine without considerable readjustment.
One alternative to chasing part variation with CAM is to replace equipment having marginal positioning accuracy with high precision CNC systems. Sometimes this is the best choice. However, another solution is to characterize and fine-tune existing CNC machines to ensure they have volumetric positioning performance adequate for producing on-spec part features anywhere within the equipment’s work envelope. When a machine’s positioning uncertainty is less than 25 percent of the part’s most critical tolerances, it will be up to the task in most cases.
A study performed by IQL (Independent Quality Laboratory, Rockville, RI) shows that the volumetric positioning accuracy of a popular, moderately priced machine tool can be improved by a factor of 2:1 versus the same machine that was purchased and installed to the manufacturer’s standard specifications.
IQL measured test pieces manufactured on a VMC1 before and after the equipment was supertuned—which is IQL’s proprietary methodology that involves using instruments traceable to NIST to characterize and adjust errors that impact a CNC machine’s positioning accuracy.
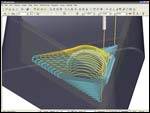
The ASME B5.54 test part was created as a solid model in SolidWorks and imported into CAD/CAM software2. The CAD/CAM-generated part program created a test piece that consisted of 36 sets of bores and counterbores, half of which were manufactured with the tool approaching the part in one direction and half with the tool approach from the opposite direction. This approach made it possible to observe the effects of reversal errors due to axis backlash.
Ultraprecision CMM measurements showed that supertuning not only improved positioning accuracy of the VMC by a factor of two, but it also dramatically minimized the disparity of positioning accuracy for parts manufactured in different locations within the machine’s working envelope.
These results suggest that, with proper tuning, a $100,000 machine tool can produce positioning results comparable to high-precision equipment costing two or three times more. What’s more, the toolmaker can now use his CAM system for what it was intended—creating geometries that most closely represent design intent while optimizing equipment productivity.
References
1 Haas VMC
2 Mastercam CAD/CAM software
For more information from CNC Software, Inc. call (800) 228-2877 or (860) 875-5006, e-mail mcinfo@mastercam.com.
Related Content
-
It Starts With the Part: A Plastic Part Checklist Ensures Good Mold Design
All successful mold build projects start with examining the part to be molded to ensure it is moldable and will meet the customers' production objectives.
-
How to Manage Wall Thickness Changes in Your Mold Design
To ensure even filling and cooling, consider wall section transitions, corners and fillets, ribs and bosses, lip and rim designs and CAE flow simulation software.
-
Mold Innovations Power Unique Auto Lighting Elements on Hummer EVs
Diamond machining, electroforming of micro-optical inserts and modified latch-lock system help injection molds produce unique forward lighting elements.


