Across the Bench - Let's Get To Work!
The vertical and horizontal position methods used to separate mold plates each have advantages and disadvantages.
| If you've been following along, you know that we have set, started, ran and pulled our 32-cavity (unscrewing) cap mold. We have all of the appropriate worksheets (i.e., IML and last shot) completed and have entered this information into our database and created a repair sheet. All three worksheets have been stapled together and placed in the maintenance manual. The next few articles will deal with repairing the mold using tools and techniques that some of you may or may not use in your own shops.
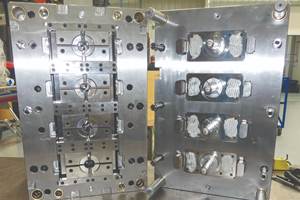
Separating Mold PlatesThere are two methods used to separate mold plates. Vertically, with the mold plates standing on end, or horizontally, the mold laying down on the front or rear clamp plate. There is available machinery to mechanically separate large molds, but for this application we will discuss the two most commonly used bench methods. Vertical Position
Advantages
C/R ReviewIt is necessary to take a few minutes to prepare for the C/R of a mold. This important preparation consists of reviewing:
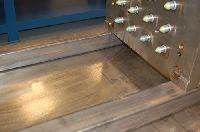
ApplicationYou now should be familiar with all of the critical information that will allow you to implement a safe, efficient and accurate repair before the first bolt is ever removed. Prior to setting the mold on the bench and separating the plates, hang the mold beside the bench and remove any external components hindering safe mold disassembly, such as bottom water fittings, hoses, hydraulic cylinders, etc.For example, when working on molds of six thousand pounds or less in the vertical position, run a stone across the bottom to remove any burrs or dings, blow out the waterlines and then set the mold directly on the bench—no parallels. Some technicians like to set molds on parallels, thinking that this makes the mold plates slide easier during disassembly/assembly. This also is how I was taught initially, but abandoned the idea when a toolmaker showed me that a braced, smooth plate slides just as easy on a flat, waxed bench-top. Also, it is much easier to reposition the plate allowing easy access to tooling or visual inspection. Using parallels limits plate movement, forcing you to lean over and twist your body around to see into counter bores and to work in awkward positions. You also will have a tendency to clean your bench less frequently, since the mold is up on the parallels, so your tools lie in crud. Setting the mold on the bench and using a pry bar, separate the mold halves. Attention must be focused toward keeping the plates parallel as they are moved apart. Most experienced technicians can eyeball the distance and know where to apply the needed pressure to separate plates smoothly. Once separated, use the repair sheet and verify all blocked cavities and positions. If a cavity is blocked off and not recorded, stop and investigate why. After checking all cavities, observe the mold faces for vent residue level, the condition of the main leader pins, bushings, interlocks for grease level and signs of galling. This will tell you if the in-press servicing frequency (every seven days for this mold) is adequate to keep the frame tooling from drying out, the mold faces clean and if the mold halves dropped in the press from improper clamping. If you are satisfied that all is well, continue to disassemble the ejector half of the mold until all plates are standing about two feet apart and supported by robust feet that will keep them upright as you move them around. At this point, check the repair sheet and determine what defects to correct first.
|
Related Content
What is Scientific Maintenance? Part 2
Part two of this three-part series explains specific data that toolrooms must collect, analyze and use to truly advance to a scientific maintenance culture where you can measure real data and drive decisions.
Read MorePrecision Welding Services Offer Rapid Turnaround Mold Repair and Reduced Molder Downtime
X-Cell Tool & Mold relies on outsourced, high-quality welding repairs from Lewis-Bawol Welding to ensure its customers' molds are back in production quickly and affordably.
Read MoreLaser Welding Versus Micro Welding
The latest battle in finely detailed restoration/repair of mold materials.
Read MoreThe Ins and Outs of Hot Runner Temperature Control
A training checklist that explains the why and how of proper hot runner temperature control and system management.
Read MoreRead Next
To Rail or Not to Rail
One of the most interesting parts of performing a maintenance capability assessment (MCA) in mold plants around the globe is observing the different styles practiced when repair technicians work on molds. When talking to repair techs about why they like a particular method or tool it is easy to see why they would think there is only one way to do things. It’s simply how they were taught by the older, tenured repair technicians.
Read MoreHow to Use Continuing Education to Remain Competitive in Moldmaking
Continued training helps moldmakers make tooling decisions and properly use the latest cutting tool to efficiently machine high-quality molds.
Read MoreAre You a Moldmaker Considering 3D Printing? Consider the 3D Printing Workshop at NPE2024
Presentations will cover 3D printing for mold tooling, material innovation, product development, bridge production and full-scale, high-volume additive manufacturing.
Read More


_300x250 3.png;maxWidth=300;quality=90)


.jpg;maxWidth=300;quality=90)


