
Preparing for Takeover Tooling
With the right preparation, moldmakers can insulate themselves from takeover tooling crises and add greater value to the molder.
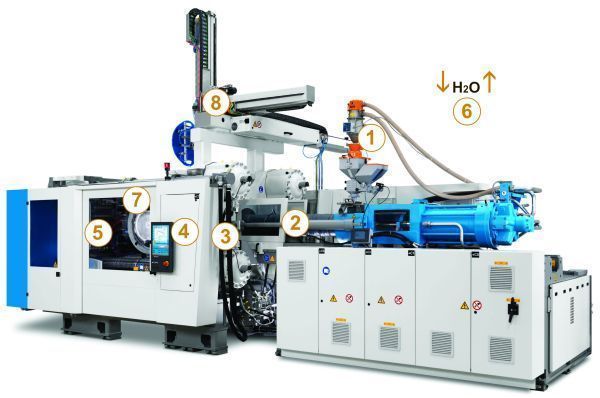
This article reviews proper preparation procedures and considerations when working with takeover tooling. Image courtesy of Krauss Maffei.
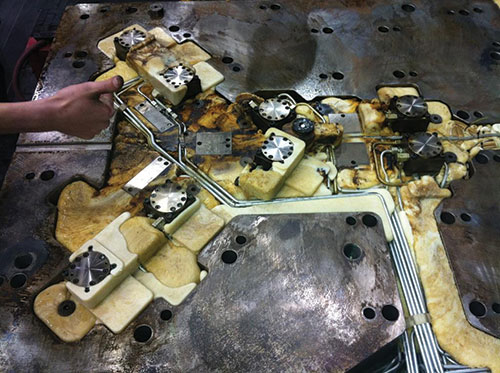
To remove a heat sink caused by unplanned steel-to-steel contact or an over-molded hot runner manifold system, as seen here, clean the overmolding or clear the steel. Images courtesy of ROI.
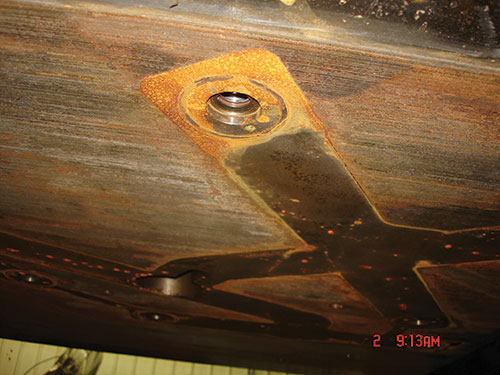
Inspect for leakage, kinks, cuts and restrictions that can cause a water leak, as seen inside this hot half assembly.


When taking over a tooling project, allow sufficient time to accurately evaluate the mold and properly handle any issues you may encounter. The following steps can help ease the process.
Part examination. Request a full set of raw parts from each cavity, any reworked parts and/or parts the customer is accepting. This will provide a realistic view of the part quality the existing tool can produce and the issues that need to be addressed—all without opening the mold.


Mold identification. Determine if the mold is the primary or capacity tool, its revision level, piece part name, and part number. Open up the mold and
examine any engraving to confirm the date wheel and/or grid.
Photo documentation. Take photos before starting any repairs or cleaning to document the mold’s condition as it was received. Also take pictures of assest tags, and mold indentification and manifold system tags. Pictures ease defect detection.
Evaluation of mold interaction and mechanical actions. Conduct a visual inspection of leader pins, bushings, return pins and parting line locks to determine the mold’s condition. If the mold has slides and lifters, place it on a bench and move the plate work. This, combined with what you learned by opening the mold previously, should indicate how well the mold will interface from half to half. Examine ejector pins to make sure they are not bell-mouthing the hole.
A spotting press is a good tool for cycling the actions and taking a hit to determine how the mold is spotting off and in what locations. If a spotting press is not available, place the tool in an injection molding machine. Be careful not to introduce plastic until you are certain that the mold will hold the cavity and remain leak free.
Vent verification. Vents can’t work if the parting line is crushed and vents are blocked, so maintaining inserts is essential. Otherwise, you can severely limit your processing window.
Evaluate the water system and determine if there is an existing water diagram in plaque or print format. If the answer is no, then start tracing water lines and documenting the hookups. Inspect for leakage, kinks, cuts and restrictions caused by a quick connect with a small through hole or a physical blockage. Clean the lines manually or with an acid or Rydlyme flush (small circulating pump used as a closed loop system). Use a thermolator and flow meters to check the flow and document.
Melt delivery system check. For cold runner systems, look for parting line damage. The overall runner condition and smooth plate movement is important. When using a three-plate design and the runner is stripped, conduct a closer inspection of the sucker pins. Inspect gate areas, including sub-gates to ensure a consistent dimensional size and polished surface. Examine the cold sprue bushing and its contact with the mold. Inspect the spherical radius seat as well.
For hot runner systems, visually inspect the gate and machine inlet areas for defects and to ensure the mating components are appropriately sized to match the manifold system. Refer to a plaque or print of the wiring schematic when setting up the hot runner controller and connecting the cables without applying power. Connect water to any hot runner cooling circuits before powering up the hot runner manifold system. This prevents damage to valve pin cylinder seals. Power up the system and run diagnostics. If you do not have a controller with diagnostics, then watch for unusual amperage draw. If you are drawing high amperage and the temperature does not lower, this may indicate a heat sink, which is cause by unplanned steel-to-steel contact or an over-injected (over-molded) hot runner system. For both scenarios, have experienced personnel clean the overmolding or clear the steel. Verify flow from all nozzles, as blocked flow paths are oftentimes difficult to diagnois. Don’t be afraid to enlist the help of a hot runner supplier to walk you through this process. Remove the clamp plate from the system and visually inspect for pinched wires, plastic or water leaks. Send to the manifold OEM for any necessary repair.
Lubrication. Appropriately grease or oil all mechanical actions before running the mold. Keep in mind that more grease is not always better, as it can block vents and contaminate cavities. And, when using graphite impregnated bushings, use 3-1 oil as an alternative to grease.
When faced with a takeover tooling project, do not succumb to the pressure of producing parts unprepared. Take your time and prepare and evaluate. Sometimes a skillful and impassioned “no” can save you and your customer thousands of dollars and conserve human capacity.


Related Content

The Ins and Outs of Hot Runner Temperature Control
A training checklist that explains the why and how of proper hot runner temperature control and system management.
Read More
Standard Hot Runner Cable Range Extension
Hasco is now offering its H12251 cable in two different lengths and four different wiring standards.
Read More
Hot Runner Systems, Controllers, Auxiliary Injection Unit Exhibitions
Mold-Masters exhibits a wide variety of new and enhanced systems and technologies at K Show like the TempMaster manifold plastic leak detection, the PET-Series two-stage hot runner system and Fusion Series G3.
Read MoreRead Next

Designing a Better Heat Exchanger - Part 3
In part three of our three-part sub-series on mold water cooling systems, we review the impact a water system can have on mold performance and part quality.
Read More
Designing a Better Heat Exchanger - Part 2
In part two of our three-part sub-series on mold water cooling systems, we review water quality and its impact on mold performance.
Read More
Designing a Better Heat Exchanger - Part 1
In a three-part sub-series, we review considerations for mold water cooling systems.
Read More