
In the Trenches: No Hill for a Stepper
On-the-job experience teaches you special techniques, tools or simple insights to help you work around many tool repair problems.

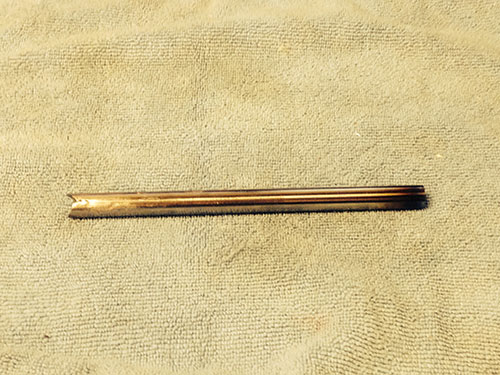
Pin core drilled to facilitate removal. Images courtesy of James Bourne.
Galled ejector pin.


Years ago, when faced with a seemingly difficult task, the toolmaker I was working under commented, “Ain’t no hill for steppers like us.” I don’t remember the specifics of the case in point, just the saying. He knew that time on the job teaches that there is almost always a work-around that you can use to overcome obstacles in your path.
Repairing tools involves dealing with problems, disasters, catastrophes and less-than-perfect circumstances every day, and the best tool in your arsenal is usually a positive attitude that allows you to face these difficulties.


I once tried to start a LinkedIn group discussion on “old Indian tricks” and was surprised when it did not garner many responses. I know I’m not the only person who has had to come up with a work-around, so I was certain others doing repair work would be full of suggestions and tricks of the trade—those special techniques, tools or simple insights on materials properties or physics that help you work around a specific problem. For example, applying heat to loosen an overly tight nut. It’s not rocket science, just the use of thermal expansion to give a little room. Another example is freezing a bushing before installing it in a hole.
Removing “Stuck” Tooling
Racking my brain to come up with something to write about this month, I saw on my desk the ejector pin shown here and thought, why not do something on tricks to remove “stuck” tooling, especially since pin galling has caused me more than a little heartburn lately. I work in a minimally equipped shop with no EDM to burn out galled tooling.
The first thing almost everyone tries is a trusty hammer. Beat it out. Sometimes this works and sometimes it doesn’t. Here are a few of the problems I have seen workers encounter while trying to beat things into submission and some tricks of the trade to work around them.
Trick No. 1: Use a Rigid Setup
Removing stuck tooling requires a little understanding of physics. Would you try to hammer a nail into a board while the board was on a mattress? Of course not. Yet I’ve seen guys hold a small piece of tooling (like a lifter head) in their hands and try to drive a roll pin in or out of it, as if a hand was significantly more rigid than a mattress.
I’m not a scientist, but I understand enough to know that all the energy put into a system must go somewhere. It will either get the work done or be absorbed, reflected or deflected. So, it is helpful (if not imperative) to hold the workpiece rigidly when hammering.
Trick No. 2: Focus Energy
Next, focus the energy where it needs to go. Something as simple as using a sander to flatten the end of a broken ejector pin will help prevent your hammer from glancing off to one side or, worse yet, bending the pin.
Another trick is taking a tool (or, more accurately, pieces of scrap) that once served a particular purpose well and elevating them to the status of tool. I used to have (and miss so much) a piece of wire EDM scrap that was just a knife-edge wedge. However, because it was made of tool steel, it held an edge and could be used to scrape tape and crud from flat surfaces. It was also useful in separating tight-fitting pieces of tooling.
Another piece of scrap that has become a tool for me is the ubiquitous drill bushing. I have quite a collection of different sized drill bushings, ejector sleeves, tubular dowels and die buttons that frequently come in handy. I have a drill bushing about 1.5-inches in diameter and 1-inch tall that is perfect for driving dowels out of small pieces of tooling. That way, I don’t have to figure out how to clamp irregular, delicate features. I can just put it on the ring and drive the dowel into the void.
Ejector sleeves can be used as guides for a drive-pin punch. Put a sleeve around a pin so half its length is on the pin (tape it in place if necessary) and insert the punch in the extended portion. Now, when you strike the punch, the energy will be focused on the work and the punch won’t glance off to the side.
Trick No. 3: Relieve Pressure
You can also use this same technique to guide the center drill when you drill out the center of a galled ejector pin (see image on page 56). Driving out a galled pin will often only exacerbate the problem; drilling out as much of the core as possible will usually relieve enough pressure that the pin can be driven out of the hole without further damage. The pin in the photo was drilled out using an old radial arm drill with a wobbly chuck.
Trick No. 4: Use Hydraulic Pressure
I wish I could say that I thought of this trick on my own, but I can’t. On more than one occasion I have used hydraulic force to remove tooling or a dowel pin from a blind hole. Drill and ream a small hole through the dowel (about an 1/8-inch hole in a 1/4-inch dowel), add a few drops of light oil, insert a 1/8-inch dowel and tap it with a hammer. The hydraulic pressure will drive the pin out of the blind hole. In the absence of other options this just may work for you.
Slide hammers made out of vise grips, lathe dogs used as collar clamps to pry against and even overhead cranes have been used to coax tight-fitting tooling into giving up its grip. Cap screws and coupling nuts make fine impromptu jack screws that can help to apply pressure in just the right place to remove stuck tooling.
That just reminded me of another useful strategy: using screws to pull tooling. More than a few times, I have built bridges out of 1-2-3 blocks spanned with a strap clamp and pulled rusted-in-place cavity blocks or flashed manifolds.
Perhaps one of these ideas will help you in the future or be the germ of an even better solution to a problem you encounter. These are just a few tricks I have learned over the years. I am interested in hearing yours as well. Happy tooling, and may ingenious solutions be yours in abundance!


Related Content

Hands-on Workshop Teaches Mold Maintenance Process
Intensive workshop teaches the process of mold maintenance to help put an end to the firefighting culture of many toolrooms.
Read More
What You Need to Know About Hot Runner Systems and How to Optimize Their Performance
How to make the most out of the hot runner design, function and performance.
Read More
Questions and Considerations Before Sending Your Mold Out for Service
Communication is essential for proper polishing, hot runner manifold cleaning, mold repair, laser engraving and laser welding services.
Read More
Most-Viewed Content of 2022
The most popular MoldMaking Technology content according to analytics reports over the past 12 months.
Read MoreRead Next

In the Trenches: Mold Repair
In this multi-part series of articles, contributer James Bourne, a tool repair supervisor and freelance writer, shares his own personal struggles in the business, as well as lessons learned and tricks of the trade garnered along the way.
Read More
How to Use Strategic Planning Tools, Data to Manage the Human Side of Business
Q&A with Marion Wells, MMT EAB member and founder of Human Asset Management.
Read More
Are You a Moldmaker Considering 3D Printing? Consider the 3D Printing Workshop at NPE2024
Presentations will cover 3D printing for mold tooling, material innovation, product development, bridge production and full-scale, high-volume additive manufacturing.
Read More