
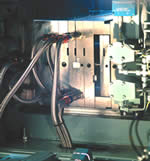
Designing the Mold: The Foundation for Success
The impact of different mold materials with regard to cooling; how to determine waterline placement for optimum cooling; placing cooling where heat is concentrated in the part; and, how to select a mold base sized for the machine being used.


Good mold engineers must understand molding, ultimately it is the plastic material behavior we are trying to predict and control.
Optimizing the mold design for mold filling, cooling and part ejection creates the best opportunity for production economics.
Today to achieve robust scientific molding the mold must be optimized to the process, and not the process dictated by the limitations of the mold.
How often do we hear moldmakers complain: Why did the customer choose this mold material? Do I have enough water circuits in this mold to effectively cool the part and allow crystallinity to develop? The customer wants a ridiculous cycle time. The customer suggests I should use my best judgment on how to place cooling.
In this article we will look at:


- The impact of different mold materials with regard to cooling
- How to determine waterline placement for optimum cooling
- Placing cooling where heat is concentrated in the part
- How to select a mold base sized for the machine being used
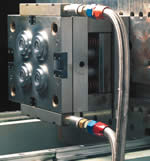
Choosing the Mold Insert Material
When choosing a mold insert material we need to first consider the kind of plastic to be molded. Is it aggressive, with lots of glass or sharp fillers? Does the material produce a corrosive gas when it degrades like PVC? If so, our choices of materials may be limited by the resistance of the material to these effects.
Next, what is the processing temperature? Is the material semi-crystalline like polypropylene where we need to consider the latent heat of fusion or an amorphous material like polystyrene, which has different cooling requirements? Based on answers to these questions we must determine where water lines need to be placed and what diameters are required.
The next issue for choosing a mold insert material is cycle time reduction. After all, 60 to 80 percent of the cycle time is cooling, and we need to remove about 60 percent of the heat from the plastic via the mold cooling system. Therefore, the thermal conductivity of the mold material is important in reducing cycle time. However, for certain applications, it may not have as much impact as we might expect.
Let’s analyze an example of a mold/material combination in a typical mold, calculate the coefficient of thermal conductivity (U), then change the cavity material and cooling line placement and analyze the effect. For a starting point, we will assume a part made of polystyrene. The mold cavities will be P-20 tool steel. The part will have a nominal wall thickness of 0.100" and waterlines will be 0.25" from the mold surface.
First we need to calculate a baseline thermal conductivity coefficient, considering two major impedances to heat transfer: plastic material and mold steel (there are two others: mold surface film and scale in the cooling channels, but these are not part of the mold build consideration).
The formula to calculate the thermal conductivity coefficient, U, is as follows:
1/U = a/Up + b/Um
Where:
a = t/4, where t is the thickness of the part, in feet. "a" is the average effective heat transfer distance the heat has to travel to exit the part.
b = the distance the cooling channels are below the surface of the mold cavity in feet
Up = the thermal conductivity of the part material
Um = the thermal conductivity of the mold material
Doing the math we determine that the coefficient of thermal conductivity of this stack up of polystyrene and P-20 = 34.
Now we will use the same formula, except we will use aluminum as the mold material. When we substitute the coefficient of thermal conductivity of the aluminum into the formula we find that the aluminum will remove heat only 2.65 percent faster, despite its higher thermal conductivity! What is the reason for this apparent discrepancy?
The problem is that we are conducting heat out of and through the plastic, as well as the mold material. When the part is relatively thick, the transfer of heat through the plastic limits the overall cooling. This is what is missing in most cooling assumptions. The ability of the plastic to transfer heat overwhelms the ability of the mold material to conduct heat away, making the choice of mold material less significant in thick walled parts.
To make matters worse, we sometimes need to move the cooling lines as a result of the material chosen. When using aluminum as the mold material, the cooling lines should be moved to .5" from the mold surface to prevent cracking of the mold. If the same formula is used we will find that the cooling capability with an aluminum mold will actually be reduced about 3 percent!
If we do the calculation for stainless steel we also find that the cooling capability is not significantly compromised. Again, for a thicker walled part, the transfer of heat through the plastic limits the rate of cooling despite the choice of mold material.
If the customer has suggested a very aggressive cycle time, could we thin the walls of the part? For example, if we reduce the walls to .050" instead of .100" and use our formula, cooling will be improved by 94 percent and there will only be half of the heat to remove! This again, shows the key role the plastic plays in cooling.
The point here is not to say the mold material is not important. The point is that mold material selection must be considered as one factor, and that high conductivity materials will only have an impact when the rate of heat removal from the plastic is not the limiting factor.
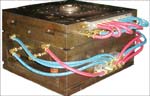
Waterline Placement for Optimum Cooling
To mathematically calculate where the waterlines should be located in our actual mold, we need to know the melt temperature, thickness of the part and temperature difference desired between the mold surface and the coolant. Let’s use an example where the melt temperature is 450°F, average part demolding temperature is to be 250°F, and the part thickness is .160". We will also assume our desired temperature of the mold surface is 60°F with coolant at 50°F.
If we want to take the simple approach, the one that gives the greatest cooling ability, we will simply use the diameter of the cooling channel and place the coolant lines one diameter away from the cavity wall, and two to three diameters apart. While this gives the greatest cooling efficiency without compromising strength it is often not possible due to the configuration of the mold.
Many times a lot of work is done to optimize waterline placement when it is unnecessary. In most cases doubling or even tripling the water line distance from the mold surface does not reduce cooling capacity if the mold surface is not required to be below 65° or 70°F. The exception is when using long deep cores or in sharp corners of standing cores—where heat is concentrated in small amounts of mold steel. Here the problem is to get the heat out of the steel and into the coolant. Cooling lines should always be concentrated where heat is concentrated with minimal cooling in other areas. Remember, the object is to get the heat out of the entire part as quickly as possible consistent with quality. On cores, the mold surface should be coolest where there are thick sections and sharp corners and warmer in other areas.
Once the placement of the coolant lines has been determined, we need to decide what diameter they should be and how many will be needed. In our sample mold we will use 1/4" waterlines that are drilled to a diameter of .437" (this company uses 1/4" waterlines as a standard). This will require .70 gallons per minute to achieve turbulent water flow. Turbulent flow increases the efficiency of the waterlines and is best achieved by assuring adequate flow, as opposed to using twisted baffles or other mechanical devices. A ¼" line diameter is a good compromise for most molds. Smaller lines, believe it or not, cool better than big ones (assuming correct spacing) and ¼" lines are still big enough to be easily machined and cleaned without too much trouble.
Based on the diameter, the waterlines should be spaced two to three times that dimension. The waterline spacing should be around 1" apart for a ¼" diameter (drilled at .437"). Our goal is a temperature drop of two to four degrees across the mold surface. This spacing should give us that capability.
Other Factors
Considerations now need to be made based on information the customer must supply the toolmaker. Do they have standard waterlines or fittings? What size temperature controllers will be used to support this mold? For quick mold changes will there be manifolds on the mold or will waterlines connect to a manifold on the molding machine?
Another item that we must keep in mind is platen coverage. The mold clamp plates must cover a minimum of two-thirds of the platens of the machine used to avoid machine damage due to platen deflection. Platens are often observed bending enough to cause center deflections of .010" to .065" every time the mold is filled and packed. It is difficult to maintain critical dimensions in the center of a deflecting mold. This is caused by a small mold size or poor mold construction.
There may be cams or components that may cause conflict when sizing a mold to fit a certain machine. If the mold is to experience many mold changes or be run in many sizes or brands of machines the use of a premium steel mold base with good center support and interlocks is advised.
If we get our cooling correct and choose the correct insert material and mold base we will give the mold the foundation necessary to achieve the aggressive cycle times requested by the customer. Of course all of these things have a price and it is most important to sell the customer on the differences and benefits or he will always buy on price.
Conclusion
The proper selection of a mold material to reduce cycle time must take into account the limitation of heat transfer through the plastic part, as well as the transfer through the steel. Understanding this can help mold designers choose the right mold material for the application. Further, correct cooling line sizing and placement must take into account the effect of coolant line diameter on heat transfer (smaller is usually better) and the importance of removing heat from areas where it is concentrated in small amounts of mold steel.


Related Content

Hands-on Workshop Teaches Mold Maintenance Process
Intensive workshop teaches the process of mold maintenance to help put an end to the firefighting culture of many toolrooms.
Read More
Solving Mold Alignment Problems with the Right Alignment Lock
Correct alignment lock selection can reduce maintenance costs and molding downtime, as well as increase part quality over the mold’s entire life.
Read More
The Benefits of Hand Scraping
Accuracy and flatness are two benefits of hand scraping that help improve machine loop stiffness, workpiece surface finish and component geometry.
Read More
Advantages and Disadvantages of Copper and Graphite Electrodes
Both copper and graphite provide approximately the same end result, so it is important for a shop to consider the advantages and disadvantages of each material in order to discover what would work best in their shop floor environment.
Read MoreRead Next

It's a Material World
Strength, hardness and machinability are the common buzzwords that come into play when examining the new materials on the market.
Read More
Are You a Moldmaker Considering 3D Printing? Consider the 3D Printing Workshop at NPE2024
Presentations will cover 3D printing for mold tooling, material innovation, product development, bridge production and full-scale, high-volume additive manufacturing.
Read More
How to Use Continuing Education to Remain Competitive in Moldmaking
Continued training helps moldmakers make tooling decisions and properly use the latest cutting tool to efficiently machine high-quality molds.
Read More